There are many different ways to install python and work with python on Windows. You can install Canopy or Anaconda to have an entire python ecosystem self-contained or you can install python directly onto your machine and configure all the bits and bytes yourself. My current recommendation is to use Vagrant on Windows combined with Virtualbox to virtualize your development environment.
While I use a mac or the majority of my development, I do find myself using Windows 10 more and more, and may be moving to a Windows machine in the future for my day-to-day laptop. I have and do use Canopy and/or Anaconda but I’ve recently moved the majority of my python development on Windows into Linux (Ubuntu) virtual machines using Vagrant and Virtualbox. You can use other products like VMWare’s virtual machine platform, but Virtualbox is free and does a good enough job for day-to-day development.1
One Caveat: if you’re doing processor / memory intensive development with python, this may not be the best option for you. That said, it can work for those types of development efforts if you configure your virtual machine with enough RAM and processors.
To get started, you’ll need to download and install Vagrant and Virtualbox for your machine. I am using Vagrant 1.90 and Virtualbox 5.1.10 at the time of this post.
Feel free to ‘run’ either of the programs, but there’s no need to enter either program just yet. To really use the Vagrant and the linux virtual machine, you’ll need to download a *nix emulator to allow you to do the things you need to with vagrant.
I use Git’s “bash” to interface with my virtual machines and Vagrant. You could use putty or CygWin or any other emulator, but I’ve found Git’s bash to be the easiest and simplest to install and use. Jump over and download git for your machine and install it. At the time of writing, I’m using Git 2.11.0.
While installing Git, I recommend leaving everything checked on the ‘select’ components window if you don’t currently have any git applications installed. If you want to use other git applications, you can uncheck the “associate .git* configuration files…” option. There is one ‘gotcha’ when installing git that you should be aware of.
On the “adjusting your path” section (see figure 1), you’ll need to think about how you want to use git on the command line.
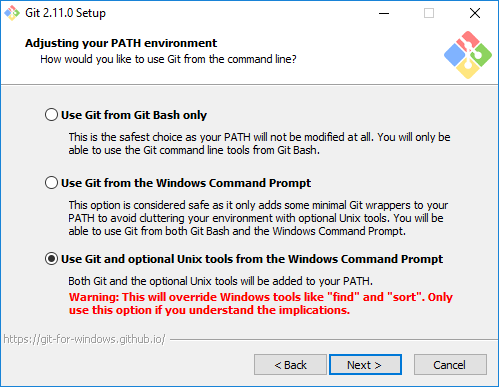
I selected the third option when installing git. I do not use git from the windows command line though…I use a git GUI along with git from the command line within my virtual environment.
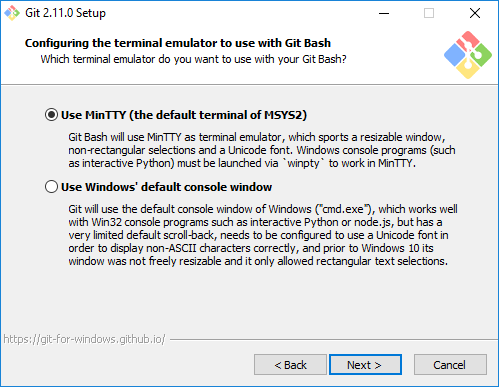
Another screen to consider is the “Configuring the terminal emulator…” screen (figure 2). I selected and use the MinTTY option because it gives me a much more *nix feel. This is personal preference. If you are going to be doing a lot of interactive python work in the console, you might want to select the 2nd option to use the windows default console window.
During the remainder of the installation, I left the rest of the options at the defaults.
Now that git (and bash) is installed, you can launch Git Bash to start working with Vagrant. You should see a window similar to Figure 3.
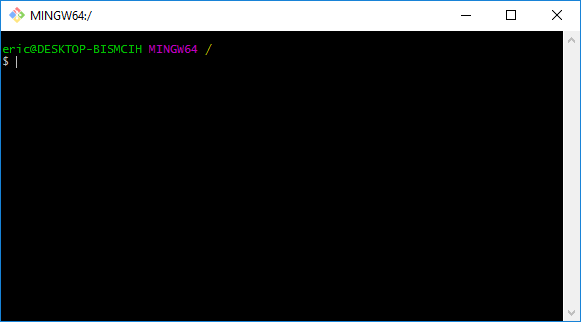
From this point, you can do your ‘vagrant init’, ‘vagrant up’ and ‘vagrant ssh’ to initialize, create and ssh into your vagrant machine.
Setting up Vagrant on Windows
For those of you that haven’t used Vagrant in the past, here’s how I set it up and use it. I generally use vagrant in this way to run jupyter, so I’ll walk you through setting things up for jupyter, pandas, etc.
First, set up a directory for your project. At the Bash command line, change into the directory you want to work from and type “mkdir vagrant_project” (or whatever name you want to use). Now, initialize your vagrant project by typing:
vagrant init
This will create a Vagrantfile in the directory you’re in. This will allow you to set the configuration of your virtual machine and Vagrant. The Vagrantfile should look something like this:
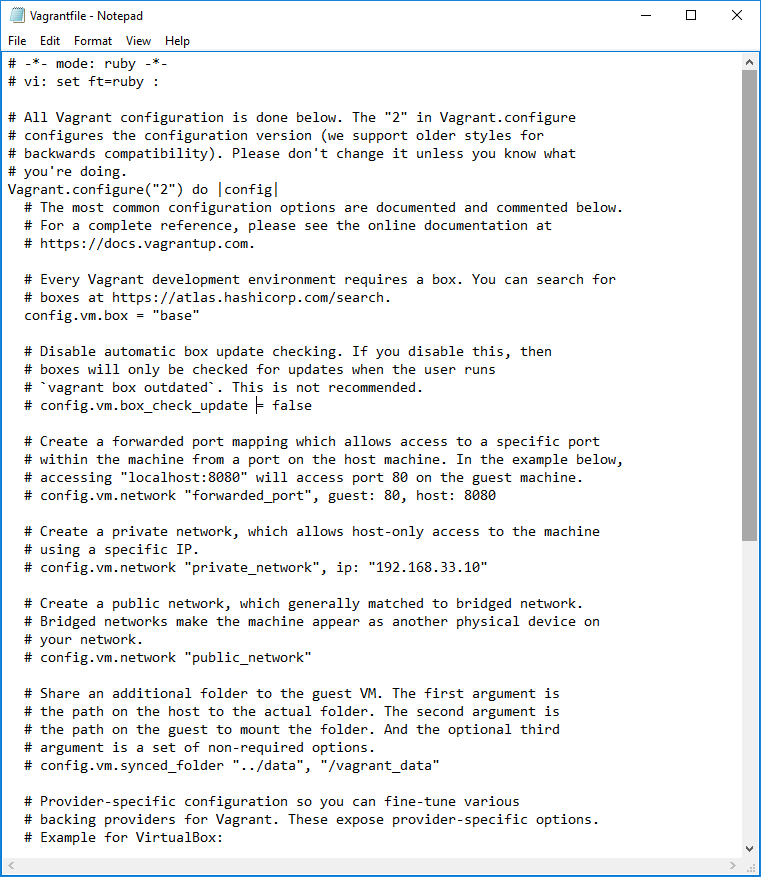
Before we go any further, open up your Vagrantfile and change the following line:
config.vm.box = "base"
change “base” to “ubuntu/xenial64” to run Ubuntu 16.04. The line should now read:
config.vm.box = "ubuntu/xenial64"
If you want to run other flavors of linux or other OS’s, you can find others at https://atlas.hashicorp.com/search.
Since I’m setting this VM up to work with jupyter, I also want to configure port forwarding in the Vagrantfile. Look for the line that reads:
# config.vm.network "forwarded_port", guest: 80, host: 8080
and add a line directly below that line to read:
config.vm.network "forwarded_port", guest: 8888, host: 8888
This addition creates a forwarded port on your system from port 8888 on your host (your windows machine) to port 8888 on your guest (the virtual machine). This will allow you to access your jupyter notebooks from your Windows browser.
At this point, you could also configure lots of other vagrant options, but these are the bare minimums that you need to get started.
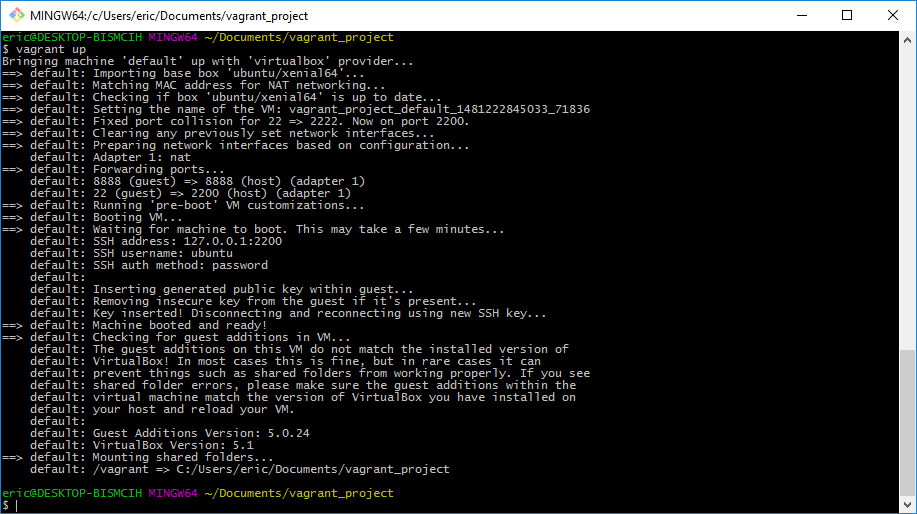
At the Bash command line, you can now type “vagrant up” to build your virtual machine. Since this is the first time you’ve run the command on this directory, it will go out and download the ubuntu/xenial64 ‘box’ and then build the virtual machine with the defaults. You might see a Windows alert asking to ‘approve’ vagrant to make some changes…go ahead and allow that.
Once the ‘vagrant up’ command is complete, you should see something similar to Figure 5 below.
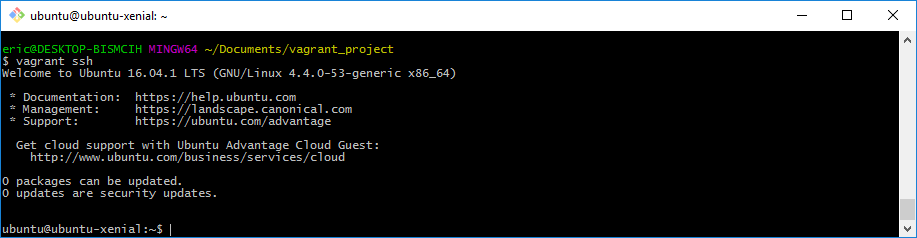
Now, you can ‘vagrant ssh’ to get into the virtual machine. You should then see something similar to Figure 6. Now your running vagrant on windows!
One of the really cool things that vagrant does by default is set up shared folders. This allows you to do your development work in your favorite IDE or editor and have the changes show up automatically in your vagrant virtual machine.
At the Bash command line, type:
cd /vagrant
You should see a directory listing that has your Vagrantfile and a log file. If you visit your project directory using windows explorer, you should see the same two files. Shared folders for the win! I know its just a small thing, but it makes things easier for initial setup.
You now have vagrant on windows!
Enjoy!
The post Vagrant on Windows appeared first on Python Data.