
Python has been largely used for numerical and scientific applications in the last years. However, to perform numerical computations in an efficient manner, Python relies on external libraries, sometimes implemented in other languages, such as the NumPy library, which is partly implemented using the Fortran language.
Due to these dependencies, sometimes it isn’t trivial to set up an environment for numerical computations, linking all the necessary libraries. It’s common for people to struggle to get things working in workshops involving the use of Python for machine learning, especially when they are using an operating system that lacks a package management system, such as Windows.
In this article, you’ll:
- Walk through the details for setting up a Python environment for numerical computations on a Windows operating system
- Be introduced to Anaconda, a Python distribution proposed to circumvent these setup problems
- See how to install the distribution on a Windows machine and use its tools to manage packages and environments
- Use the installed Python stack to build a neural network and train it to solve a classic classification problem
Free Bonus: Click here to get access to a Conda cheat sheet with handy usage examples for managing your Python environment and packages.
Introducing Anaconda and Conda
Since 2011, Python has included pip, a package management system used to install and manage software packages written in Python. However, for numerical computations, there are several dependencies that are not written in Python, so the initial releases of pip could not solve the problem by themselves.
To circumvent this problem, Continuum Analytics released Anaconda, a Python distribution focused on scientific applications and Conda, a package and environment management system, which is used by the Anaconda distribution. It’s worth noticing that the more recent versions of pip can handle external dependencies using wheels, but, by using Anaconda, you’ll be able to install critical libraries for data science more smoothly. (You can read more on this discussion here.)
Although Conda is tightly coupled to the Anaconda Python Distribution, the two are distinct projects with different goals:
-
Anaconda is a full distribution of the software in the PyData ecosystem, including Python itself along with binaries for several third-party open-source projects. Besides Anaconda, there’s also Miniconda, which is a minimal Python distribution including basically Conda and its dependencies so that you can install only the packages you need, from scratch
-
Conda is a package, dependency, and environment management system that could be installed without the Anaconda or Miniconda distribution. It runs on Windows, macOS, and Linux and was created for Python programs, but it can package and distribute software for any language. The main purpose is to solve external dependencies issues in an easy way, by downloading pre-compiled versions of software.
In this sense, it is more like a cross-platform version of a general purpose package manager such as APT or YUM, which helps to find and install packages in a language-agnostic way. Also, Conda is an environment manager, so if you need a package that requires a different version of Python, by using Conda, it is possible to set up a separate environment with a totally different version of Python, maintaining your usual version of Python on your default environment.
There’s a lot of discussion regarding the creation of another package management system for the Python ecosystem. It’s worth mentioning that Conda’s creators pushed Python standard packaging to the limit and only created a second tool when it was clear that it was the only reasonable way forward.
Curiously, even Guido van Rossum, at his speech at the inaugural PyData meetup in 2012, said that, when it comes to packaging, “it really sounds like your needs are so unusual compared to the larger Python community that you’re just better off building your own.” (You can watch a video of this discussion.) More information about this discussion can be found here and here.
Anaconda and Miniconda have become the most popular Python distributions, widely used for data science and machine learning in various companies and research laboratories. They are free and open source projects and currently include 1400+ packages in the repository. In the following section, we’ll go through the installation of the Miniconda Python distribution on a Windows machine.
Installing the Miniconda Python Distribution
In this section, you’ll see step-by-step how to set up a data science Python environment on Windows. Instead of the full Anaconda distribution, you’ll be using Miniconda to set up a minimal environment containing only Conda and its dependencies, and you’ll use that to install the necessary packages.
The installation processes for Miniconda and Anaconda are very similar. The basic difference is that Anaconda provides an environment with a lot of pre-installed packages, many of which are never used. (You can check the list here.) Miniconda is minimalist and clean, and it allows you to easily install any of Anaconda’s packages.
In this article, the focus will be on using the command line interface (CLI) to set up the packages and environments. However, it’s possible to use Conda to install Anaconda Navigator, a graphical user interface (GUI), if you wish.
Miniconda can be installed using an installer available here. You’ll notice there are installers for Windows, macOS, and Linux, and for 32-bit or 64-bit operating systems. You should consider the appropriate architecture according to your Windows installation and download the Python 3.x version (at the time of writing this article, 3.7).
There’s no reason to use Python 2 on a fresh project anymore, and if you do need Python 2 on some project you’re working on, due to some library that has not been updated, it is possible to set up a Python 2 environment using Conda, even if you installed the Miniconda Python 3.x distribution, as you will see in the next section.
After the download finishes, you just have to run the installer and follow the installation steps:
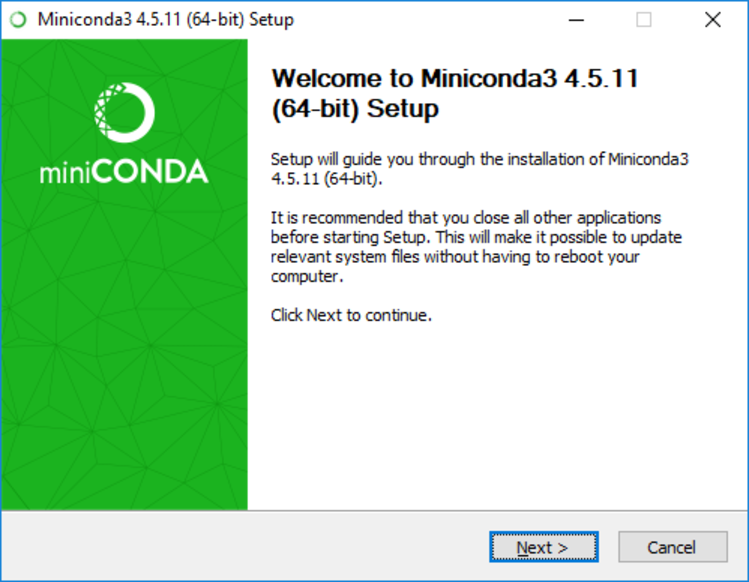
- Click on Next on the welcome screen:
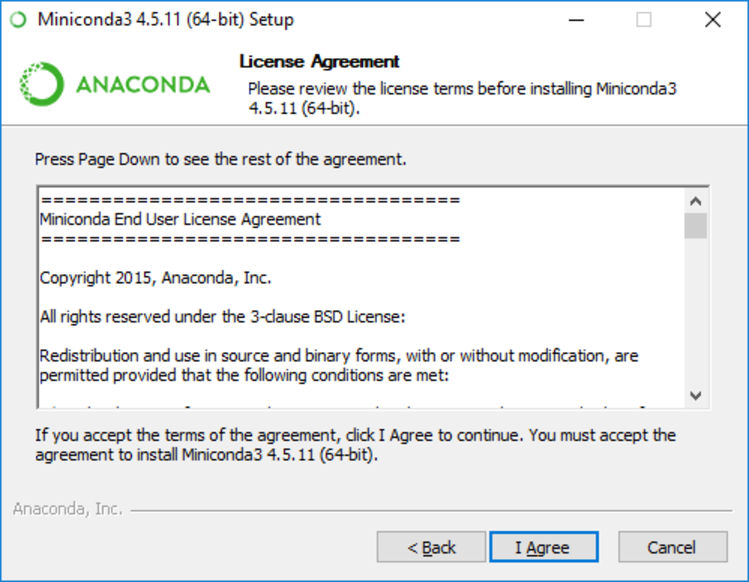
- Click on I Agree to agree to the license terms:
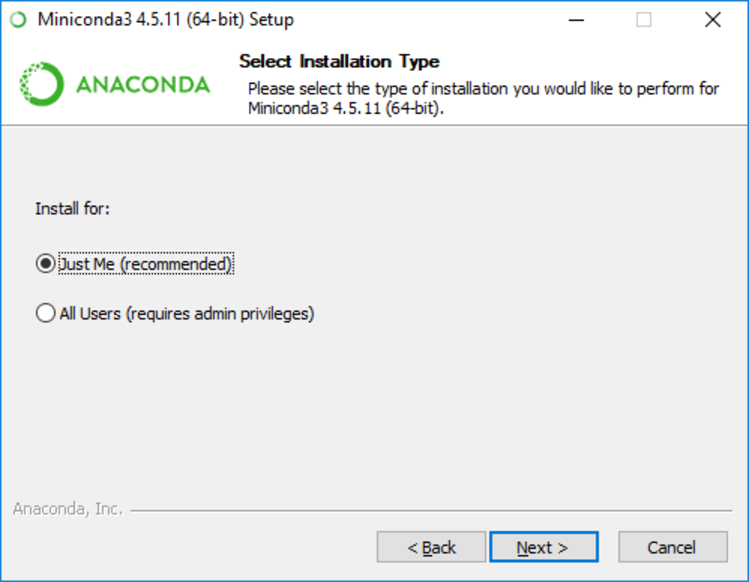
- Choose the installation type and click Next. Another advantage of using Anaconda or Miniconda is that it is possible to install the distribution using a local account. (It isn’t necessary to have an administrator account.) If this is the case, choose Just Me. Otherwise, if you have an administrator account, you may choose All Users:
- Choose the install location and click Next. If you’ve chosen to install just for you, the default location will be the folder Miniconda3 under your user’s personal folder. It’s important not to use spaces in the folder names in the path to Miniconda, since many Python packages have problems when spaces are used in folder names:

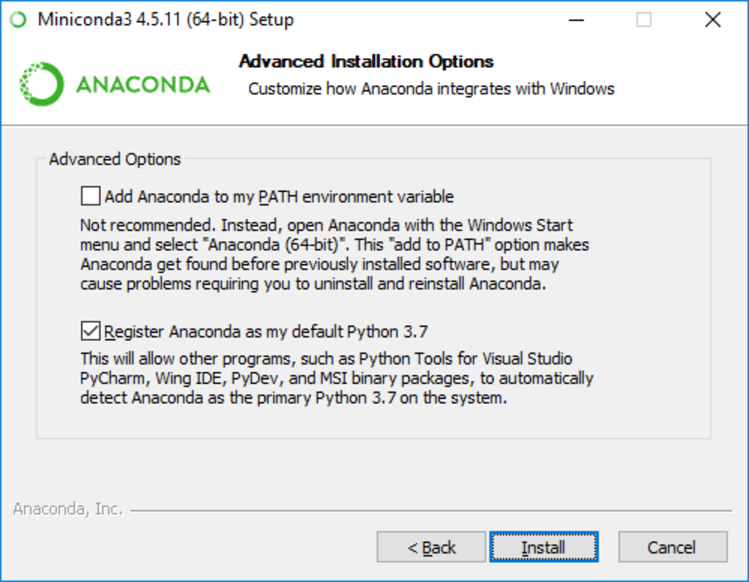
- In Advanced Installation Options, the suggestion is to use the default choices, which are to not add Anaconda to the PATH environment variable and to register Anaconda as the default Python. Click Install to begin installation:
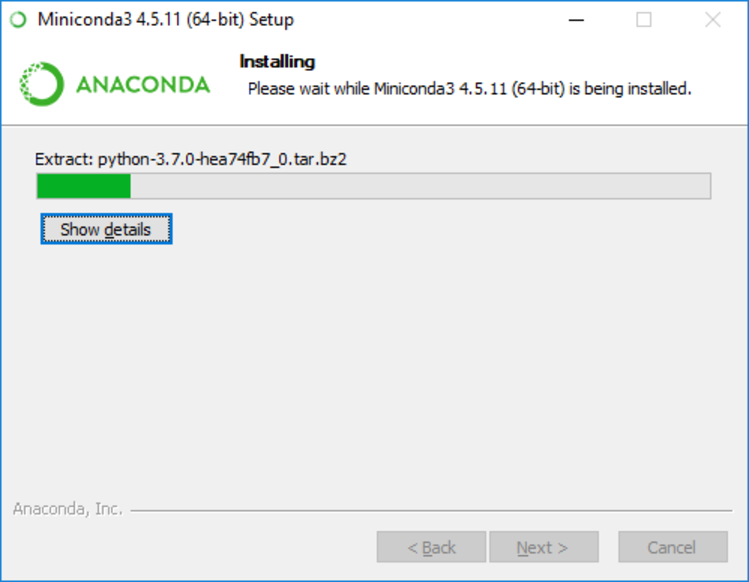
- Wait while the installer copies the files:
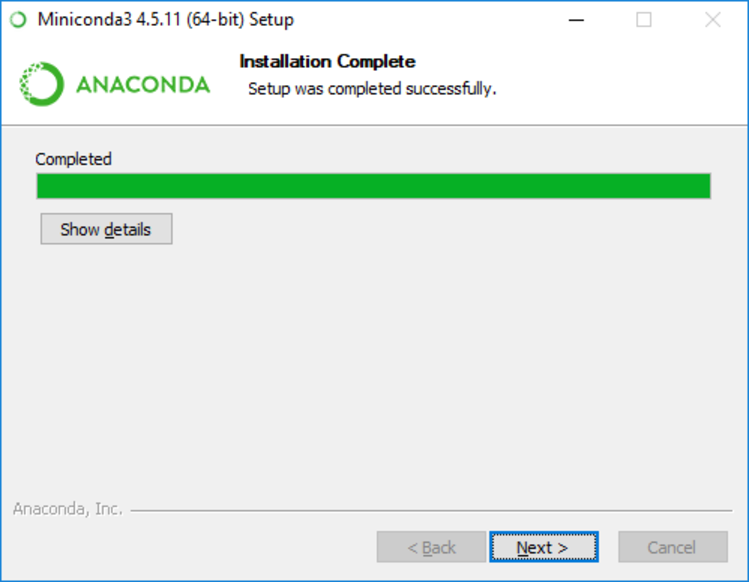
- When the installation completes, click on Next:
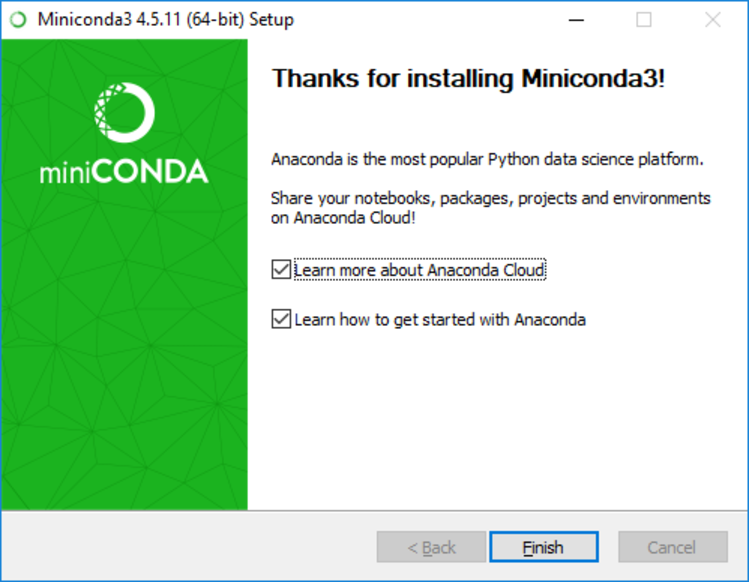
- Click on Finish to finish the installation and close the installer:
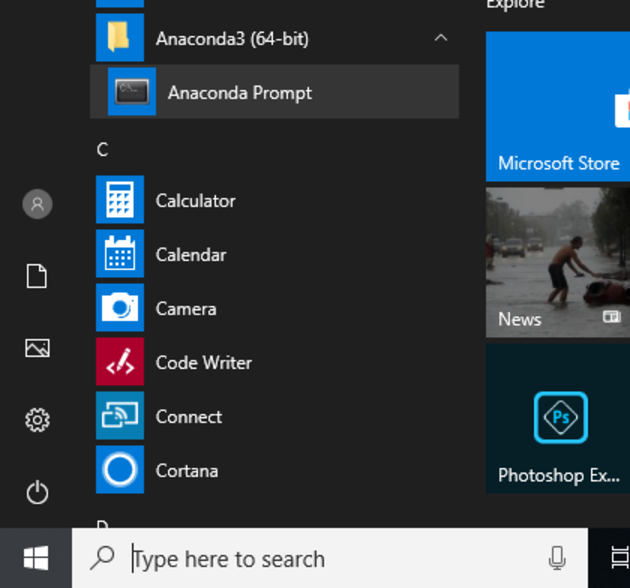
As Anaconda was not included in the PATH environment variable, its commands won’t work in the Windows default command prompt. To use the distribution, you should start its own command prompt, which can be done by clicking on the Start button and on Anaconda Prompt under Anaconda3 (64 bit):
When the prompt opens, you can check if Conda is available by running conda --version:
(base) C:UsersIEUser>conda --version
conda 4.5.11
To get more information about the installation, you can run conda info:
(base) C:UsersIEUser>conda info

     active environment : base
    active env location : C:UsersIEUserMiniconda3
            shell level : 1
       user config file : C:UsersIEUser.condarc
 populated config files : C:UsersIEUser.condarc
          conda version : 4.5.11
    conda-build version : not installed
         python version : 3.7.0.final.0
       base environment : C:UsersIEUserMiniconda3  (writable)
           channel URLs : https://repo.anaconda.com/pkgs/main/win-64
                          https://repo.anaconda.com/pkgs/main/noarch
                          https://repo.anaconda.com/pkgs/free/win-64
                          https://repo.anaconda.com/pkgs/free/noarch
                          https://repo.anaconda.com/pkgs/r/win-64
                          https://repo.anaconda.com/pkgs/r/noarch
                          https://repo.anaconda.com/pkgs/pro/win-64
                          https://repo.anaconda.com/pkgs/pro/noarch
                          https://repo.anaconda.com/pkgs/msys2/win-64
                          https://repo.anaconda.com/pkgs/msys2/noarch
          package cache : C:UsersIEUserMiniconda3pkgs
                          C:UsersIEUserAppDataLocalcondacondapkgs
       envs directories : C:UsersIEUserMiniconda3envs
                          C:UsersIEUserAppDataLocalcondacondaenvs
                          C:UsersIEUser.condaenvs
               platform : win-64
             user-agent : conda/4.5.11 requests/2.19.1 CPython/3.7.0 Windows/10 Windows/10.0.17134
          administrator : False
             netrc file : None
           offline mode : False
Now that you have Miniconda installed, let’s see how Conda environments work.
Understanding Conda Environments
When you start developing a project from scratch, it’s recommended that you use the latest versions of the libraries you need. However, when working with someone else’s project, such as when running an example from Kaggle or Github, you may need to install specific versions of packages or even another version of Python due to compatibility issues.
This problem may also occur when you try to run an application you’ve developed long ago, which uses a particular library version that does not work with your application anymore due to updates.
Virtual environments are a solution to this kind of problem. By using them, it is possible to create multiple environments, each one with different versions of packages. A typical Python set up includes Virtualenv, a tool to create isolated Python virtual environments, widely used in the Python community.
Conda includes its own environment manager and presents some advantages over Virtualenv, especially concerning numerical applications, such as the ability to manage non-Python dependencies and the ability to manage different versions of Python, which is not possible with Virtualenv. Besides that, Conda environments are entirely compatible with default Python packages that may be installed using pip.
Miniconda installation provides Conda and a root environment with a version of Python and some basic packages installed. Besides this root environment, it is possible to set up additional environments including different versions of Python and packages.
Using the Anaconda prompt, it is possible to check the available Conda environments by running conda env list:
(base) C:UsersIEUser>conda env list
# conda environments:
#
base                  *  C:UsersIEUserMiniconda3
This base environment is the root environment, created by the Miniconda installer. It is possible to create another environment, named otherenv, by running conda create --name otherenv:
(base) C:UsersIEUser>conda create --name otherenv
Solving environment: done

## Package Plan ##

  environment location: C:UsersIEUserMiniconda3envsotherenv


Proceed ([y]/n)? y

Preparing transaction: done
Verifying transaction: done
Executing transaction: done
#
# To activate this environment, use
#
#     $ conda activate otherenv
#
# To deactivate an active environment, use
#
#     $ conda deactivate
As notified after the environment creation process is finished, it is possible to activate the otherenv environment by running conda activate otherenv. You’ll notice the environment has changed by the indication between parentheses in the beginning of the prompt:
(base) C:UsersIEUser>conda activate otherenv

(otherenv) C:UsersIEUser>
You can open the Python interpreter within this environment by running python:
(otherenv) C:UsersIEUser>python
Python 3.7.0 (default, Jun 28 2018, 08:04:48) [MSC v.1912 64 bit (AMD64)] :: Anaconda, Inc. on win32
Type "help", "copyright", "credits" or "license" for more information.
>>>
The environment includes Python 3.7.0, the same version included in the root base environment. To exit the Python interpreter, just run quit():
>>> quit()

(otherenv) C:UsersIEUser>
To deactivate the otherenv environment and go back to the root base environment, you should run deactivate:
(otherenv) C:UsersIEUser>deactivate

(base) C:UsersIEUser>
As mentioned earlier, Conda allows you to easily create environments with different versions of Python, which is not straightforward with Virtualenv. To include a different Python version within an environment, you have to specify it by using python=<version> when running conda create. For example, to create an environment named py2 with Python 2.7, you have to run conda create --name py2 python=2.7:
(base) C:UsersIEUser>conda create --name py2 python=2.7
Solving environment: done

## Package Plan ##

  environment location: C:UsersIEUserMiniconda3envspy2

  added / updated specs:
    - python=2.7


The following NEW packages will be INSTALLED:

    certifi:        2018.8.24-py27_1
    pip:            10.0.1-py27_0
    python:         2.7.15-he216670_0
    setuptools:     40.2.0-py27_0
    vc:             9-h7299396_1
    vs2008_runtime: 9.00.30729.1-hfaea7d5_1
    wheel:          0.31.1-py27_0
    wincertstore:   0.2-py27hf04cefb_0

Proceed ([y]/n)? y

Preparing transaction: done
Verifying transaction: done
Executing transaction: done
#
# To activate this environment, use
#
#     $ conda activate py2
#
# To deactivate an active environment, use
#
#     $ conda deactivate


(base) C:UsersIEUser>
As shown by the output of conda create, this time some new packages were installed, since the new environment uses Python 2. You can check the new environment indeed uses Python 2 by activating it and running the Python interpreter:
(base) C:UsersIEUser>conda activate py2

(py2) C:UsersIEUser>python
Python 2.7.15 |Anaconda, Inc.| (default, May  1 2018, 18:37:09) [MSC v.1500 64 bit (AMD64)] on win32
Type "help", "copyright", "credits" or "license" for more information.
>>>
Now, if you run conda env list, you should see the two environments that were created, besides the root base environment:
(py2) C:UsersIEUser>conda env list
# conda environments:
#
base                     C:UsersIEUserMiniconda3
otherenv                 C:UsersIEUserMiniconda3envsotherenv
py2               *  C:UsersIEUserMiniconda3envspy2


(py2) C:UsersIEUser>
In the list, the asterisk indicates the activated environment. It is possible to remove an environment by running conda remove --name <environment name> --all. Since it is not possible to remove an activated environment, you should first deactivate the py2 environment, to remove it:
(py2) C:UsersIEUser>deactivate

(base) C:UsersIEUser>conda remove --name py2 --all

Remove all packages in environment C:UsersIEUserMiniconda3envspy2:


## Package Plan ##

  environment location: C:UsersIEUserMiniconda3envspy2


The following packages will be REMOVED:

    certifi:        2018.8.24-py27_1
    pip:            10.0.1-py27_0
    python:         2.7.15-he216670_0
    setuptools:     40.2.0-py27_0
    vc:             9-h7299396_1
    vs2008_runtime: 9.00.30729.1-hfaea7d5_1
    wheel:          0.31.1-py27_0
    wincertstore:   0.2-py27hf04cefb_0

Proceed ([y]/n)? y


(base) C:UsersIEUser>
Now that you’ve covered the basics of managing environments with Conda, let’s see how to manage packages within the environments.
Understanding Basic Package Management With Conda
Within each environment, packages of software can be installed using the Conda package manager. The root base environment created by the Miniconda installer includes some packages by default that are not part of Python standard library.
The default installation includes the minimum packages necessary to use Conda. To check the list of installed packages in an environment, you just have to make sure it is activated and run conda list. In the root environment, the following packages are installed by default:
(base) C:UsersIEUser>conda list
# packages in environment at C:UsersIEUserMiniconda3:
#
# Name                    Version                   Build  Channel
asn1crypto                0.24.0                   py37_0
ca-certificates           2018.03.07                    0
certifi                   2018.8.24                py37_1
cffi                      1.11.5           py37h74b6da3_1
chardet                   3.0.4                    py37_1
conda                     4.5.11                   py37_0
conda-env                 2.6.0                         1
console_shortcut          0.1.1                         3
cryptography              2.3.1            py37h74b6da3_0
idna                      2.7                      py37_0
menuinst                  1.4.14           py37hfa6e2cd_0
openssl                   1.0.2p               hfa6e2cd_0
pip                       10.0.1                   py37_0
pycosat                   0.6.3            py37hfa6e2cd_0
pycparser                 2.18                     py37_1
pyopenssl                 18.0.0                   py37_0
pysocks                   1.6.8                    py37_0
python                    3.7.0                hea74fb7_0
pywin32                   223              py37hfa6e2cd_1
requests                  2.19.1                   py37_0
ruamel_yaml               0.15.46          py37hfa6e2cd_0
setuptools                40.2.0                   py37_0
six                       1.11.0                   py37_1
urllib3                   1.23                     py37_0
vc                        14                   h0510ff6_3
vs2015_runtime            14.0.25123                    3
wheel                     0.31.1                   py37_0
win_inet_pton             1.0.1                    py37_1
wincertstore              0.2                      py37_0
yaml                      0.1.7                hc54c509_2

(base) C:UsersIEUser>
To manage the packages, you should also use Conda. Next, let’s see how to search, install, update, and remove packages using Conda.
Searching and Installing Packages
Packages are installed from repositories called channels by Conda, and some default channels are configured by the installer. To search for a specific package, you can run conda search <package name>. For example, this is how you search for the keras package (a machine learning library):
(base) C:UsersIEUser>conda search keras
Loading channels: done
# Name                  Version           Build  Channel
keras                     2.0.8  py35h15001cb_0  pkgs/main
keras                     2.0.8  py36h65e7a35_0  pkgs/main
keras                     2.1.2          py35_0  pkgs/main
keras                     2.1.2          py36_0  pkgs/main
keras                     2.1.3          py35_0  pkgs/main
keras                     2.1.3          py36_0  pkgs/main

... (more)
According to the previous output, there are different versions of the package and different builds for each version, such as for Python 3.5 and 3.6.
The previous search shows only exact matches for packages named keras. To perform a broader search, including all packages containing keras in their names, you should use the wildcard *. For example, when you run conda search *keras*, you get the following:
(base) C:UsersIEUser>conda search *keras*
Loading channels: done
# Name                  Version           Build  Channel
keras                     2.0.8  py35h15001cb_0  pkgs/main
keras                     2.0.8  py36h65e7a35_0  pkgs/main
keras                     2.1.2          py35_0  pkgs/main
keras                     2.1.2          py36_0  pkgs/main
keras                     2.1.3          py35_0  pkgs/main
keras                     2.1.3          py36_0  pkgs/main

... (more)

keras-applications           1.0.2          py35_0  pkgs/main
keras-applications           1.0.2          py36_0  pkgs/main
keras-applications           1.0.4          py35_0  pkgs/main

... (more)

keras-base                2.2.0          py35_0  pkgs/main
keras-base                2.2.0          py36_0  pkgs/main

... (more)
As the previous output shows, there are some other keras related packages in the default channels.
To install a package, you should run conda install <package name>. By default, the newest version of the package will be installed in the active environment. So, let’s install the package keras in the environment otherenv that you’ve already created:
(base) C:UsersIEUser>conda activate otherenv

(otherenv) C:UsersIEUser>conda install keras
Solving environment: done

## Package Plan ##

  environment location: C:UsersIEUserMiniconda3envsotherenv

  added / updated specs:
    - keras


The following NEW packages will be INSTALLED:

    _tflow_1100_select:  0.0.3-mkl
    absl-py:             0.4.1-py36_0
    astor:               0.7.1-py36_0
    blas:                1.0-mkl
    certifi:             2018.8.24-py36_1
    gast:                0.2.0-py36_0
    grpcio:              1.12.1-py36h1a1b453_0
    h5py:                2.8.0-py36h3bdd7fb_2
    hdf5:                1.10.2-hac2f561_1
    icc_rt:              2017.0.4-h97af966_0
    intel-openmp:        2018.0.3-0
    keras:               2.2.2-0
    keras-applications:  1.0.4-py36_1
    keras-base:          2.2.2-py36_0
    keras-preprocessing: 1.0.2-py36_1
    libmklml:            2018.0.3-1
    libprotobuf:         3.6.0-h1a1b453_0
    markdown:            2.6.11-py36_0
    mkl:                 2019.0-117
    mkl_fft:             1.0.4-py36h1e22a9b_1
    mkl_random:          1.0.1-py36h77b88f5_1
    numpy:               1.15.1-py36ha559c80_0
    numpy-base:          1.15.1-py36h8128ebf_0
    pip:                 10.0.1-py36_0
    protobuf:            3.6.0-py36he025d50_0
    python:              3.6.6-hea74fb7_0
    pyyaml:              3.13-py36hfa6e2cd_0
    scipy:               1.1.0-py36h4f6bf74_1
    setuptools:          40.2.0-py36_0
    six:                 1.11.0-py36_1
    tensorboard:         1.10.0-py36he025d50_0
    tensorflow:          1.10.0-mkl_py36hb361250_0
    tensorflow-base:     1.10.0-mkl_py36h81393da_0
    termcolor:           1.1.0-py36_1
    vc:                  14-h0510ff6_3
    vs2013_runtime:      12.0.21005-1
    vs2015_runtime:      14.0.25123-3
    werkzeug:            0.14.1-py36_0
    wheel:               0.31.1-py36_0
    wincertstore:        0.2-py36h7fe50ca_0
    yaml:                0.1.7-hc54c509_2
    zlib:                1.2.11-h8395fce_2

Proceed ([y]/n)?
Conda manages the necessary dependencies for a package when it is installed. Since the package keras has a lot of dependencies, when you install it, Conda manages to install this big list of packages.
It’s worth noticing that, since the keras package’s newest build uses Python 3.6 and the otherenv environment was created using Python 3.7, the package python version 3.6.6 was included as a dependency. After confirming the installation, you can check that the Python version for the otherenv environment is downgraded to the 3.6.6 version.
Sometimes, you don’t want packages to be downgraded, and it would be better to just create a new environment with the necessary version of Python. To check the list of new packages, updates, and downgrades necessary for a package without installing it, you should use the parameter --dry-run. For example, to check the packages that will be changed by the installation of the package keras, you should run the following:
(otherenv) C:UsersIEUser>conda install keras --dry-run
However, if necessary, it is possible to change the default Python of a Conda environment by installing a specific version of the package python. To demonstrate that, let’s create a new environment called envpython:
(otherenv) C:UsersIEUser>conda create --name envpython
Solving environment: done

## Package Plan ##

  environment location: C:UsersIEUserMiniconda3envsenvpython


Proceed ([y]/n)? y

Preparing transaction: done
Verifying transaction: done
Executing transaction: done
#
# To activate this environment, use
#
#     $ conda activate envpython
#
# To deactivate an active environment, use
#
#     $ conda deactivate
As you saw before, since the root base environment uses Python 3.7, envpython is created including this same version of Python:
(base) C:UsersIEUser>conda activate envpython

(envpython) C:UsersIEUser>python
Python 3.7.0 (default, Jun 28 2018, 08:04:48) [MSC v.1912 64 bit (AMD64)] :: Anaconda, Inc. on win32
Type "help", "copyright", "credits" or "license" for more information.
>>> quit()

(envpython) C:UsersIEUser>
To install a specific version of a package, you can run conda install <package name>=<version>. For example, this is how you install Python 3.6 in the envpython environment:
(envpython) C:UsersIEUser>conda install python=3.6
Solving environment: done

## Package Plan ##

  environment location: C:UsersIEUserMiniconda3envsenvpython

  added / updated specs:
    - python=3.6


The following NEW packages will be INSTALLED:

    certifi:        2018.8.24-py36_1
    pip:            10.0.1-py36_0
    python:         3.6.6-hea74fb7_0
    setuptools:     40.2.0-py36_0
    vc:             14-h0510ff6_3
    vs2015_runtime: 14.0.25123-3
    wheel:          0.31.1-py36_0
    wincertstore:   0.2-py36h7fe50ca_0

Proceed ([y]/n)?
In case you need to install more than one package in an environment, it is possible to run conda install only once, passing the names of the packages. To illustrate that, let’s install numpy, scipy, and matplotlib, basic packages for numerical computation in the root base environment:
(envpython) C:UsersIEUser>deactivate

(base) C:UsersIEUser>conda install numpy scipy matplotlib
Solving environment: done

## Package Plan ##

  environment location: C:UsersIEUserMiniconda3

  added / updated specs:
    - matplotlib
    - numpy
    - scipy


The following packages will be downloaded:

    package                    |            build
    ---------------------------|-----------------
    libpng-1.6.34              |       h79bbb47_0         1.3 MB
    mkl_random-1.0.1           |   py37h77b88f5_1         267 KB
    intel-openmp-2019.0        |              117         1.7 MB
    qt-5.9.6                   |   vc14h62aca36_0        92.5 MB
    matplotlib-2.2.3           |   py37hd159220_0         6.5 MB
    tornado-5.1                |   py37hfa6e2cd_0         668 KB
    pyqt-5.9.2                 |   py37ha878b3d_0         4.6 MB
    pytz-2018.5                |           py37_0         232 KB
    scipy-1.1.0                |   py37h4f6bf74_1        13.5 MB
    jpeg-9b                    |       hb83a4c4_2         313 KB
    python-dateutil-2.7.3      |           py37_0         260 KB
    numpy-base-1.15.1          |   py37h8128ebf_0         3.9 MB
    numpy-1.15.1               |   py37ha559c80_0          37 KB
    mkl_fft-1.0.4              |   py37h1e22a9b_1         120 KB
    kiwisolver-1.0.1           |   py37h6538335_0          61 KB
    pyparsing-2.2.0            |           py37_1          96 KB
    cycler-0.10.0              |           py37_0          13 KB
    freetype-2.9.1             |       ha9979f8_1         470 KB
    icu-58.2                   |       ha66f8fd_1        21.9 MB
    sqlite-3.24.0              |       h7602738_0         899 KB
    sip-4.19.12                |   py37h6538335_0         283 KB
    ------------------------------------------------------------
                                           Total:       149.5 MB

The following NEW packages will be INSTALLED:

    blas:            1.0-mkl
    cycler:          0.10.0-py37_0
    freetype:        2.9.1-ha9979f8_1
    icc_rt:          2017.0.4-h97af966_0
    icu:             58.2-ha66f8fd_1
    intel-openmp:    2019.0-117
    jpeg:            9b-hb83a4c4_2
    kiwisolver:      1.0.1-py37h6538335_0
    libpng:          1.6.34-h79bbb47_0
    matplotlib:      2.2.3-py37hd159220_0
    mkl:             2019.0-117
    mkl_fft:         1.0.4-py37h1e22a9b_1
    mkl_random:      1.0.1-py37h77b88f5_1
    numpy:           1.15.1-py37ha559c80_0
    numpy-base:      1.15.1-py37h8128ebf_0
    pyparsing:       2.2.0-py37_1
    pyqt:            5.9.2-py37ha878b3d_0
    python-dateutil: 2.7.3-py37_0
    pytz:            2018.5-py37_0
    qt:              5.9.6-vc14h62aca36_0
    scipy:           1.1.0-py37h4f6bf74_1
    sip:             4.19.12-py37h6538335_0
    sqlite:          3.24.0-h7602738_0
    tornado:         5.1-py37hfa6e2cd_0
    zlib:            1.2.11-h8395fce_2

Proceed ([y]/n)?
Now that you’ve covered how to search and install packages, let’s see how to update and remove them using Conda.
Updating and Removing Packages
Sometimes, when new packages are released, you need to update them. To do so, you may run conda update <package name>. In case you wish to update all the packages within one environment, you should activate the environment and run conda update --all.
To remove a package, you can run conda remove <package name>. For example, this is how you remove numpy from the root base environment:
(base) C:UsersIEUser>conda remove numpy
Solving environment: done

## Package Plan ##

  environment location: C:UsersIEUserMiniconda3

  removed specs:
    - numpy


The following packages will be REMOVED:

    matplotlib: 2.2.3-py37hd159220_0
    mkl_fft:    1.0.4-py37h1e22a9b_1
    mkl_random: 1.0.1-py37h77b88f5_1
    numpy:      1.15.1-py37ha559c80_0
    scipy:      1.1.0-py37h4f6bf74_1

Proceed ([y]/n)?
It’s worth noting that when you remove a package, all packages that depend on it are also removed.
Using Channels
Sometimes, you won’t find the packages you want to install on the default channels configured by the installer. For example, this is how you install pytorch, another machine learning package:
(base) C:UsersIEUser>conda search pytorch
Loading channels: done

PackagesNotFoundError: The following packages are not available from current channels:

  - pytorch

Current channels:

  - https://repo.anaconda.com/pkgs/main/win-64
  - https://repo.anaconda.com/pkgs/main/noarch
  - https://repo.anaconda.com/pkgs/free/win-64
  - https://repo.anaconda.com/pkgs/free/noarch
  - https://repo.anaconda.com/pkgs/r/win-64
  - https://repo.anaconda.com/pkgs/r/noarch
  - https://repo.anaconda.com/pkgs/pro/win-64
  - https://repo.anaconda.com/pkgs/pro/noarch
  - https://repo.anaconda.com/pkgs/msys2/win-64
  - https://repo.anaconda.com/pkgs/msys2/noarch

To search for alternate channels that may provide the conda package you're
looking for, navigate to

    https://anaconda.org

and use the search bar at the top of the page.
In this case, you may search for the package here. If you search for pytorch, you’ll get the following results:
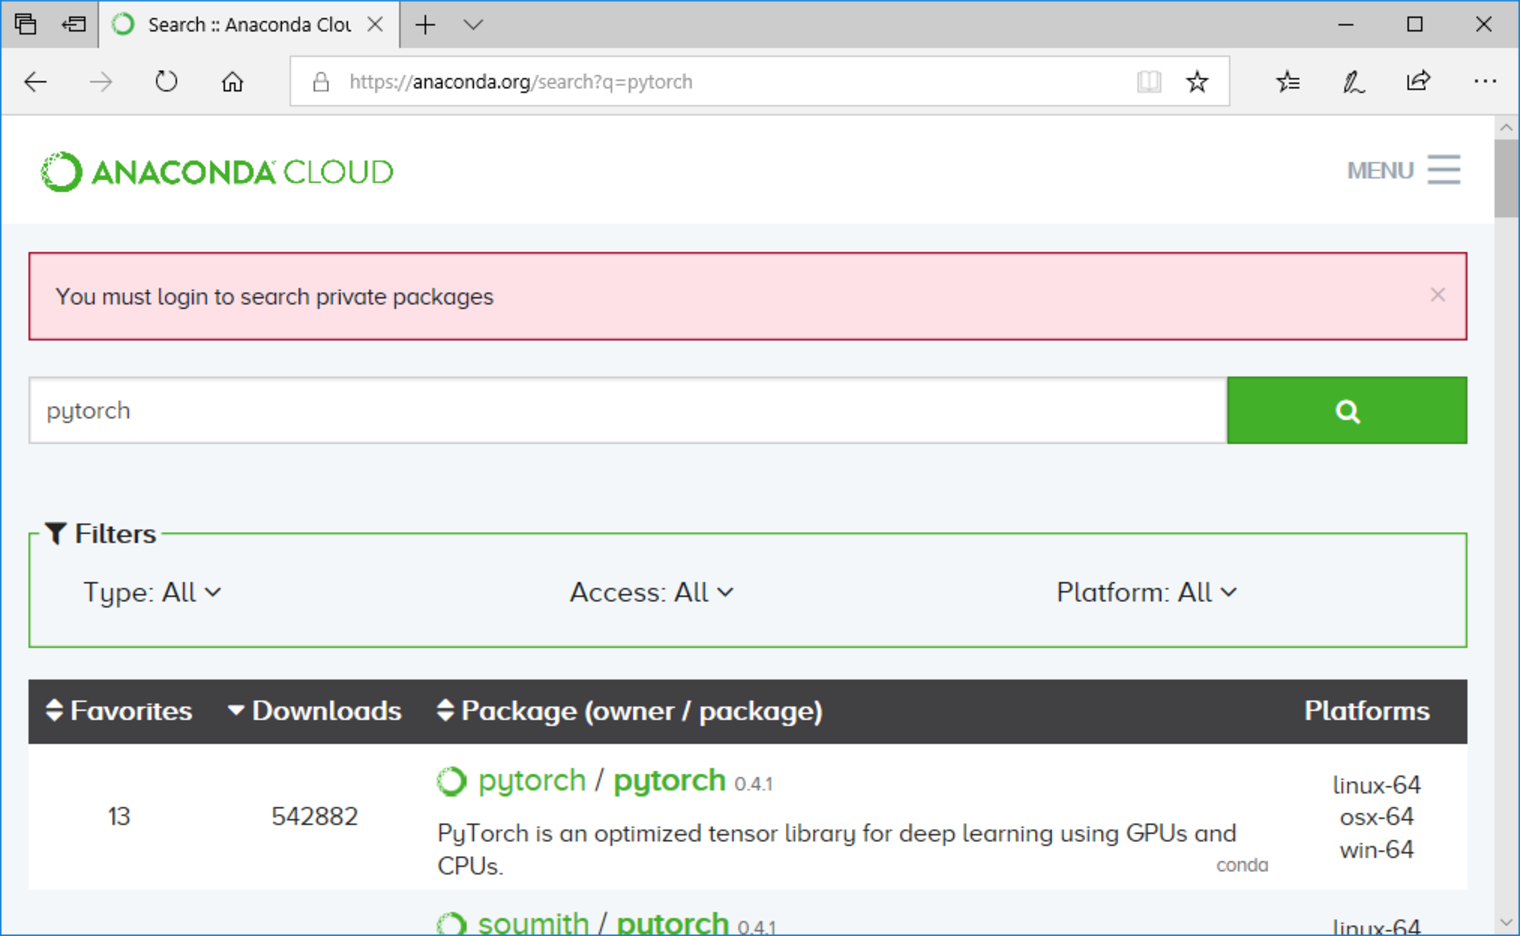
The channel pytorch has a package named pytorch with version 0.4.1. To install a package from a specific channel you can use the -c <channel> parameter with conda install:
(base) C:UsersIEUser>conda install -c pytorch pytorch
Solving environment: done

## Package Plan ##

  environment location: C:UsersIEUserMiniconda3

  added / updated specs:
    - pytorch


The following packages will be downloaded:

    package                    |            build
    ---------------------------|-----------------
    pytorch-0.4.1              |py37_cuda90_cudnn7he774522_1       590.4 MB  pytorch

The following NEW packages will be INSTALLED:

    pytorch: 0.4.1-py37_cuda90_cudnn7he774522_1 pytorch

Proceed ([y]/n)?
Alternatively, you can add the channel, so that Conda uses it to search for packages to install. To list the current channels used, you can run conda config --get channels:
(base) C:UsersIEUser>conda config --get channels
--add channels 'defaults'   # lowest priority

(base) C:UsersIEUser>
The Miniconda installer includes only the defaults channels. When more channels are included, it is necessary to set the priority of them to determine from which channel a package will be installed in case it is available from more than one channel.
To add a channel with the lowest priority to the list, you should run conda config --append channels <channel name>. To add a channel with the highest priority to the list, you should run conda config --prepend channels <channel name>. It is recommended to add new channels with low priority, to keep using the default channels prior to the others. So, alternatively, you can install pytorch, adding the pytorch channel and running conda install pytorch:
(base) C:UsersIEUser>conda config --append channels pytorch

(base) C:UsersIEUser>conda config --get channels
--add channels 'pytorch'   # lowest priority
--add channels 'defaults'   # highest priority

(base) C:UsersIEUser>conda install pytorch
Solving environment: done

## Package Plan ##

  environment location: C:UsersIEUserMiniconda3

  added / updated specs:
    - pytorch


The following packages will be downloaded:

    package                    |            build
    ---------------------------|-----------------
    pytorch-0.4.1              |py37_cuda90_cudnn7he774522_1       590.4 MB  pytorch

The following NEW packages will be INSTALLED:

    pytorch: 0.4.1-py37_cuda90_cudnn7he774522_1 pytorch

Proceed ([y]/n)?
Not all packages are available on Conda channels. However, this is not a problem, since you also can use pip to install packages inside Conda environments. Let’s see how to do this.
Using pip Inside Conda Environments
Sometimes, you may need pure Python packages and, generally, these packages are not available on Conda’s channels. For example, if you search for unipath, a package to deal with file paths in Python, Conda won’t be able to find it.
You could search for the package here and use another channel to install it. However, since unipath is a pure Python package, you could use pip to install it, as you would do on a regular Python setup. The only difference is that you should use pip installed by the Conda package pip. To illustrate that, let’s create a new environment called newproject. As mentioned before, you can do this running conda create:
conda create --name newproject
Next, to have pip installed, you should activate the environment and install the Conda package pip:
(base) C:UsersIEUser>conda activate newproject

(newproject) C:UsersIEUser>conda install pip
Solving environment: done

## Package Plan ##

  environment location: C:UsersIEUserMiniconda3envsnewproject

  added / updated specs:
    - pip


The following NEW packages will be INSTALLED:

    certifi:        2018.8.24-py37_1
    pip:            10.0.1-py37_0
    python:         3.7.0-hea74fb7_0
    setuptools:     40.2.0-py37_0
    vc:             14-h0510ff6_3
    vs2015_runtime: 14.0.25123-3
    wheel:          0.31.1-py37_0
    wincertstore:   0.2-py37_0

Proceed ([y]/n)?
Finally, use pip to install the package unipath:
(newproject) C:UsersIEUser>pip install unipath
Collecting unipath
Installing collected packages: unipath
Successfully installed unipath-1.1
You are using pip version 10.0.1, however version 18.0 is available.
You should consider upgrading via the 'python -m pip install --upgrade pip' command.

(newproject) C:UsersIEUser>
After installation, you can list the installed packages with conda list and check that Unipath was installed using pip:
(newproject) C:UsersIEUser>conda list
# packages in environment at C:UsersIEUserMiniconda3envsnewproject:
#
# Name                    Version                   Build  Channel
certifi                   2018.8.24                py37_1
pip                       10.0.1                   py37_0
python                    3.7.0                hea74fb7_0
setuptools                40.2.0                   py37_0
Unipath                   1.1                       <pip>
vc                        14                   h0510ff6_3
vs2015_runtime            14.0.25123                    3
wheel                     0.31.1                   py37_0
wincertstore              0.2                      py37_0

(newproject) C:UsersIEUser>
It’s also possible to install packages from a version control system (VCS) using pip. For example, let’s install supervisor, version 4.0.0dev0, available in a Git repository. As Git is not installed in the newproject environment, you should install it first:
(newproject) C:UsersIEUser> conda install git
Then, install supervisor, using pip to install it from the Git repository:
(newproject) pip install -e git://github.com/Supervisor/supervisor@abef0a2be35f4aae4a4edeceadb7a213b729ef8d#egg=supervisor
After the installation finishes, you can see that supervisor is listed in the installed packages list:
(newproject) C:UsersIEUser>conda list
#
# Name                    Version                   Build  Channel
certifi                   2018.8.24                py37_1
git                       2.18.0               h6bb4b03_0
meld3                     1.0.2                     <pip>
pip                       10.0.1                   py37_0
python                    3.7.0                hea74fb7_0
setuptools                40.2.0                   py37_0
supervisor                4.0.0.dev0                <pip>

... (more)
Now that you know the basics of using environments and managing packages with Conda, let’s create a simple machine learning example to solve a classic problem using a neural network.
A Simple Machine Learning Example
In this section, you’ll set up the environment using Conda and train a neural network to function like an XOR gate.
An XOR gate implements the digital logic exclusive OR operation, which is widely used in digital systems. It takes two digital inputs, that can be equal to 0, representing a digital false value or 1, representing a digital true value and outputs 1 (true) if the inputs are different or 0 (false), if the inputs are equal. The following table (referred as a truth table in the digital systems terminology) summarizes the XOR gate operation:
| Input A | Input B | Output: A XOR B |
|---|---|---|
| 0 | 0 | 0 |
| 0 | 1 | 1 |
| 1 | 0 | 1 |
| 1 | 1 | 0 |
The XOR operation can be interpreted as a classification problem, given that it takes two inputs and should classify them in one of two classes represented by 0 or 1, depending on whether the inputs are equal to each other or different from one another.
It is commonly used as a first example to train a neural network because it is simple and, at the same time, demands a nonlinear classifier, such as a neural network. The neural network will use only the data from the truth table, without knowledge about where it came from, to “learn” the operation performed by the XOR gate.
To implement the neural network, let’s create a new Conda environment, named nnxor:
(base) C:UsersIEUser>conda create nnxor
Then, let’s activate it and install the package keras:
(base) C:UsersIEUser>conda activate nnxor

(nnxor) C:UsersIEUser>conda install keras
keras is a high-level API that makes easy-to-implement neural networks on top of well-known machine learning libraries, such as TensorFlow.
You’ll train the following neural network to act as an XOR gate:
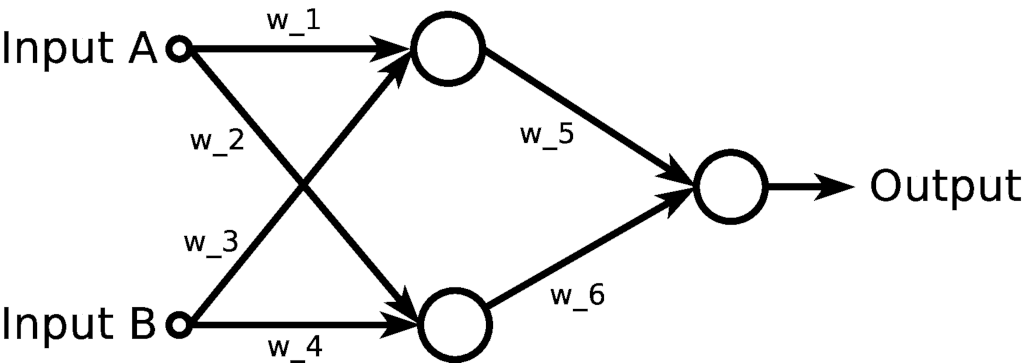
The network takes two inputs, A and B, and feeds them to two neurons, represented by the big circles. Then, it takes the outputs of these two neurons and feeds them to an output neuron, which should provide the classification according to the XOR truth table.
In brief, the training process consists of adjusting the values of the weights w_1 until w_6, so that the output is consistent with the XOR truth table. To do so, input examples will be fed, one at a time, the output will be calculated according to current values of the weights and, by comparing the output with the desired output, given by the truth table, the values of the weights will be adjusted in a step-by-step process.
To organize the project, you’ll create a folder named nnxor within Windows user’s folder (C:UsersIEUser) with a file named nnxor.py to store the Python program to implement the neural network:

In the nnxor.py file, you’ll define the network, perform the training, and test it:
import numpy as np
np.random.seed(444)

from keras.models import Sequential
from keras.layers.core import Dense, Activation
from keras.optimizers import SGD

X = np.array([[0, 0],
              [0, 1],
              [1, 0],
              [1, 1]])
y = np.array([[0], [1], [1], [0]])

model = Sequential()
model.add(Dense(2, input_dim=2))
model.add(Activation('sigmoid'))
model.add(Dense(1))
model.add(Activation('sigmoid'))

sgd = SGD(lr=0.1)
model.compile(loss='mean_squared_error', optimizer=sgd)

model.fit(X, y, batch_size=1, epochs=5000)

if __name__ == '__main__':
    print(model.predict(X))
First, you import numpy, initialize a random seed, so that you can reproduce the same results when running the program again, and import the keras objects you’ll use to build the neural network.
Then, you define an X array, containing the 4 possible A-B sets of inputs for the XOR operation and a y array, containing the outputs for each of the sets of inputs defined in X.
The next five lines define the neural network. The Sequential() model is one of the models provided by keras to define a neural network, in which the layers of the network are defined in a sequential way. Then you define the first layer of neurons, composed of two neurons, fed by two inputs, defining their activation function as a sigmoid function in the sequence. Finally, you define the output layer composed of one neuron with the same activation function.
The following two lines define the details about the training of the network. To adjust the weights of the network, you’ll use the Stochastic Gradient Descent (SGD) with the learning rate equal to 0.1, and you’ll use the mean squared error as a loss function to be minimized.
Finally, you perform the training by running the fit() method, using X and y as training examples and updating the weights after every training example is fed into the network (batch_size=1). The number of epochs represents the number of times the whole training set will be used to train the neural network.
In this case, you’re repeating the training 5000 times using a training set containing 4 input-output examples. By default, each time the training set is used, the training examples are shuffled.
On the last line, after the training process has finished, you print the predicted values for the 4 possible input examples.
By running this script, you’ll see the evolution of the training process and the performance improvement as new training examples are fed into the network:
(nnxor) C:UsersIEUser>cd nnxor

(nnxor) C:UsersIEUsernnxor>python nnxor.py
Using TensorFlow backend.
Epoch 1/5000
2018-09-16 09:49:05.987096: I tensorflow/core/platform/cpu_feature_guard.cc:141] Your CPU supports instructions that this TensorFlow binary was not compiled to use: AVX AVX2
2018-09-16 09:49:05.993128: I tensorflow/core/common_runtime/process_util.cc:69] Creating new thread pool with default inter op setting: 2. Tune using inter_op_parallelism_threads for best performance.
4/4 [==============================] - 0s 39ms/step - loss: 0.2565
Epoch 2/5000
4/4 [==============================] - 0s 0us/step - loss: 0.2566
Epoch 3/5000
4/4 [==============================] - 0s 0us/step - loss: 0.2566
Epoch 4/5000
4/4 [==============================] - 0s 0us/step - loss: 0.2566
Epoch 5/5000
4/4 [==============================] - 0s 0us/step - loss: 0.2566
Epoch 6/5000
4/4 [==============================] - 0s 0us/step - loss: 0.2566
After the training finishes, you can check the predictions the network gives for the possible input values:
Epoch 4997/5000
4/4 [==============================] - 0s 0us/step - loss: 0.0034
Epoch 4998/5000
4/4 [==============================] - 0s 0us/step - loss: 0.0034
Epoch 4999/5000
4/4 [==============================] - 0s 0us/step - loss: 0.0034
Epoch 5000/5000
4/4 [==============================] - 0s 0us/step - loss: 0.0034
[[0.0587215 ]
 [0.9468337 ]
 [0.9323144 ]
 [0.05158457]]
As you defined X = np.array([[0, 0], [0, 1], [1, 0], [1, 1]]), the expected output values are 0, 1, 1, and 0, which is consistent with the predicted outputs of the network, given you should round them to obtain binary values.
Where To Go From Here
Data science and machine learning applications are emerging in the most diverse areas, attracting more people. However, setting up an environment for numerical computation can be a complicated task, and it’s common to find users having trouble in data science workshops, especially when using Windows.
In this article, you’ve covered the basics of setting up a Python numerical computation environment on a Windows machine using the Anaconda Python distribution.
Free Bonus: Click here to get access to a Conda cheat sheet with handy usage examples for managing your Python environment and packages.
Now that you have a working environment, it’s time to start working with some applications. Python is one of the most used languages for data science and machine learning, and Anaconda is one of the most popular distributions, used in various companies and research laboratories. It provides several packages to install libraries that Python relies on for data acquisition, wrangling, processing, and visualization.
Fortunately there are a lot of tutorials about these libraries available at Real Python, including the following:
- NumPy tutorials
- Python Plotting With Matplotlib (Guide)
- Python Histogram Plotting: NumPy, Matplotlib, Pandas & Seaborn
- Pure Python vs NumPy vs TensorFlow Performance Comparison
- Python Pandas: Tricks & Features You May Not Know
- Fast, Flexible, Easy, and Intuitive: How to Speed Up Your Pandas Projects
- Pythonic Data Cleaning With NumPy and Pandas
Also, if you’d like a deeper understanding of Anaconda and Conda, check out the following links:
[ Improve Your Python With 🐍 Python Tricks 💌 – Get a short & sweet Python Trick delivered to your inbox every couple of days. >> Click here to learn more and see examples ]