Back in May 2015, Miguel showed us all how to deploy WordPress on Bluemix using containers. Now you can use the official WordPress image from the Docker Hub instead of the custom image used in the previous tutorial!
How?
This tutorial assumes you have already installed docker, the cf cli, and the cf “ic” plugin. For instructions on how to install these, please refer to the bluemix docs.
Step 0: Log into Bluemix and target your desired space
|
1 |
cf login –a api.ng.bluemix.net |
|
1 |
cf ic login |
Step 1: Copy the official WordPress image to your IBM Containers Registry
|
1 |
cf ic cpi wordpress wordpress |
As described in the Bluemix docs, “cpi” will automatically “Access a Docker Hub image or an image from your local registry and copy it to your private Bluemix repository.”
Step 2: Create the volume that will serve as the WordPress file system
|
1 |
$ cf ic volume create [VOLUME] |
You can name the volume whatever you want but remember the name for when you run the container in step 4.
Step 3: Create Services
For this tutorial we are going to use the “ClearDB MySQL Database” service as well as the “Sendgrid” service that was in the optional portion of the previous tutorial. To create instances of these services using the CLI you would run:
|
1 |
cf create–service cleardb spark [CLEARDB_SERVICE_INSTANCE] |
|
1 |
cf create–service sendgrid free [SENDGRID_SERVICE_INSTANCE] |
Refer to the Bluemix catalog for a comprehensive list of available services.
Step 4: Run the Container with the WordPress Image
IBM Bluemix offers a consistent development model across its 3 compute options (cloud foundry, containers, and virtual machines) by allowing users to bind services to their application, container, or virtual machine.
The credentials for interacting with the service are injected into your application/container/VM via a special environment variable named VCAP_SERVICES.
In the case of containers, the service will also flatten the JSON structure of this environment variable as follows:
|
1 2 3 4 5 6 7 8 9 10 11 12 13 14 15 16 17 18 |
{ “cleardb”: [ { “name”: “mydb”, “label”: “cleardb”, “plan”: “spark”, “credentials”: { “jdbcUrl”: “”, “uri”: “”, “name”: “”, “hostname”: “”, “port”: “”, “username”: “”, “password”: “” } } ] } |
These are some example credentials as they would appear on the IBM Bluemix console.
|
1 2 3 4 5 6 |
VCAP_SERVICES_CLEARDB_0_NAME VCAP_SERVICES_CLEARDB_0_LABEL VCAP_SERVICES_CLEARDB_0_PLAN VCAP_SERVICES_CLEARDB_0_CREDENTIALS_JDBCURL VCAP_SERVICES_CLEARDB_0_CREDENTIALS_URI ... |
This is how the same credentials would appear after being flattened.
To run the official WordPress image on IBM containers, we can map these VCAP_SERVICES environment variables to the ones expected by the image as part of our run command:
|
1 2 3 4 5 6 |
cf ic run –p 80 –v [VOLUME]:/wp–content –e CCS_BIND_SRV=“[CLEARDB_SERVICE_INSTANCE],[SENDGRID_SERVICE_INSTANCE]” –e WORDPRESS_DB_HOST=‘${VCAP_SERVICES_CLEARDB_0_CREDENTIALS_HOSTNAME}:${VCAP_SERVICES_CLEARDB_0_CREDENTIALS_PORT}’ –e WORDPRESS_DB_USER=‘${VCAP_SERVICES_CLEARDB_0_CREDENTIALS_USERNAME}’ –e WORDPRESS_DB_PASSWORD=‘${VCAP_SERVICES_CLEARDB_0_CREDENTIALS_PASSWORD}’ –e WORDPRESS_DB_NAME=‘${VCAP_SERVICES_CLEARDB_0_CREDENTIALS_NAME}’ registry.ng.bluemix.net/[NAMESPACE]/wordpress sh –c ‘eval “$(env | grep WORDPRESS)” && /entrypoint.sh apache2-foreground’ |
If you are working from a Windows machine you must run the command from the
Docker Quickstart Terminal.
Specifically, this command sets each WORDPRESS variable to the name of the corresponding VCAP_SERVICES variable, then passes a command which evaluates these assignments on the container before running the image’s normal entrypoint.
note:Make sure to replace [VOLUME], [NAMESPACE], [CLEARDB_SERVICE_INSTANCE], and [SENDGRID_SERVICE_INSTANCE] with their respective values.
Step 5: Requesting and Binding an IP
Check on the status of your new container:
|
1 |
cf ic ps –a |
Pay special attention to the PORTS column. We want it to contain your desired IP and port. If it is missing an IP, then you will need to request a new one (or unbind an existing one) and bind it.
To print your current list of IPs, run:
|
1 |
cf ic ip list |
To request a new IP (free trial accounts are currently limited to 2):
|
1 |
cf ic ip request |
To bind it to your container:
|
1 |
cf ic ip bind [YOUR_IP] [YOUR_CONTAINER] |
After binding the IP to the container you will access WordPress by typing the bound IP into your browser.
Setting up email in your WordPress Container (optional):
The container does not have an SMTP server configuration and so the WordPress email functionality will not work. We can use the SendGrid plugin to remedy this. In step 3 we bound a SendGrid service instance to our container. Now it is just a matter of installing the plugin and setting credentials.
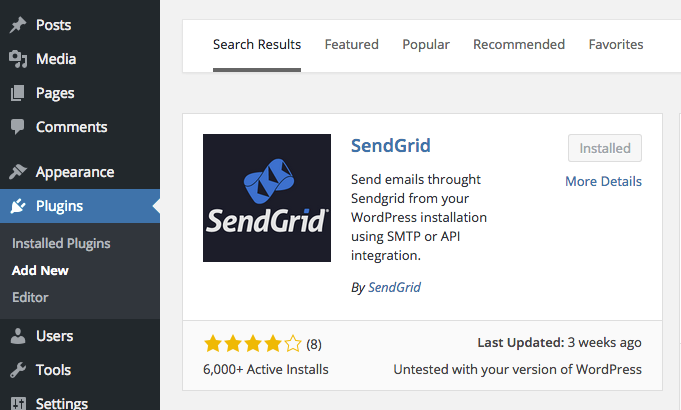
Step 1. Install the SendGrid plugin in your WordPress instance.
The plugin can be installed in the wordpress ui (Plugins > AddNew > Search (Sendgrid))
Once it is installed, make sure to activate it.
Step 2. Set Credentials
Go to Plugins > Installed Plugins > SendGrid Settings
To fill out the username and password, you will need to print the credentials that were created when you bound this service instance to your container. To accomplish the binding and unbinding of service instances to a container, IBM Containers uses the Cloud Foundry Service Keys feature that was contributed in the summer of 2015.
While normally the credentials are injected into your running container, sometimes it is easier to just print the credentials and copy/paste them to the corresponding fields. To obtain the SendGrid username and password, you must first find the corresponding service key by running:
|
1 |
cf service–keys [SENDGRID_SERVICE_INSTANCE] |
Once you find the service key associated with your running container (the container name should be in the key), you can retrieve the SendGrid credentials:
|
1 |
cf service–key [SENDGRID_SERVICE_INSTANCE] [SERVICE_KEY] |
Fill in the Username and Password fields from the service key credentials and proceed to configure your own mail settings. You can try sending a test email from the same page. If the email is sent properly, then your WordPress installation is complete!
If you want to know more about the jStart team please visit our site, and talk to us more from our contact page.
Luke joined IBM’s jStart team as a co-op in January 2016 . Luke is a junior, pursuing Bachelor’s of Science degrees in both Computer Science and Mathematics at Appalachian State University.