When performing data science tasks, it’s common to want to use data found on the internet. You’ll usually be able to access this data in csv format, or via an Application Programming Interface(API). However, there are times when the data you want can only be accessed as part of a web page. In cases like this, you’ll want to use a technique called web scraping to get the data from the web page into a format you can work with in your analysis.
In this tutorial, we’ll show you how to perform web scraping using Python 3 and the BeautifulSoup library. We’ll be scraping weather forecasts from the National Weather Service, and then analyzing them using the Pandas library.
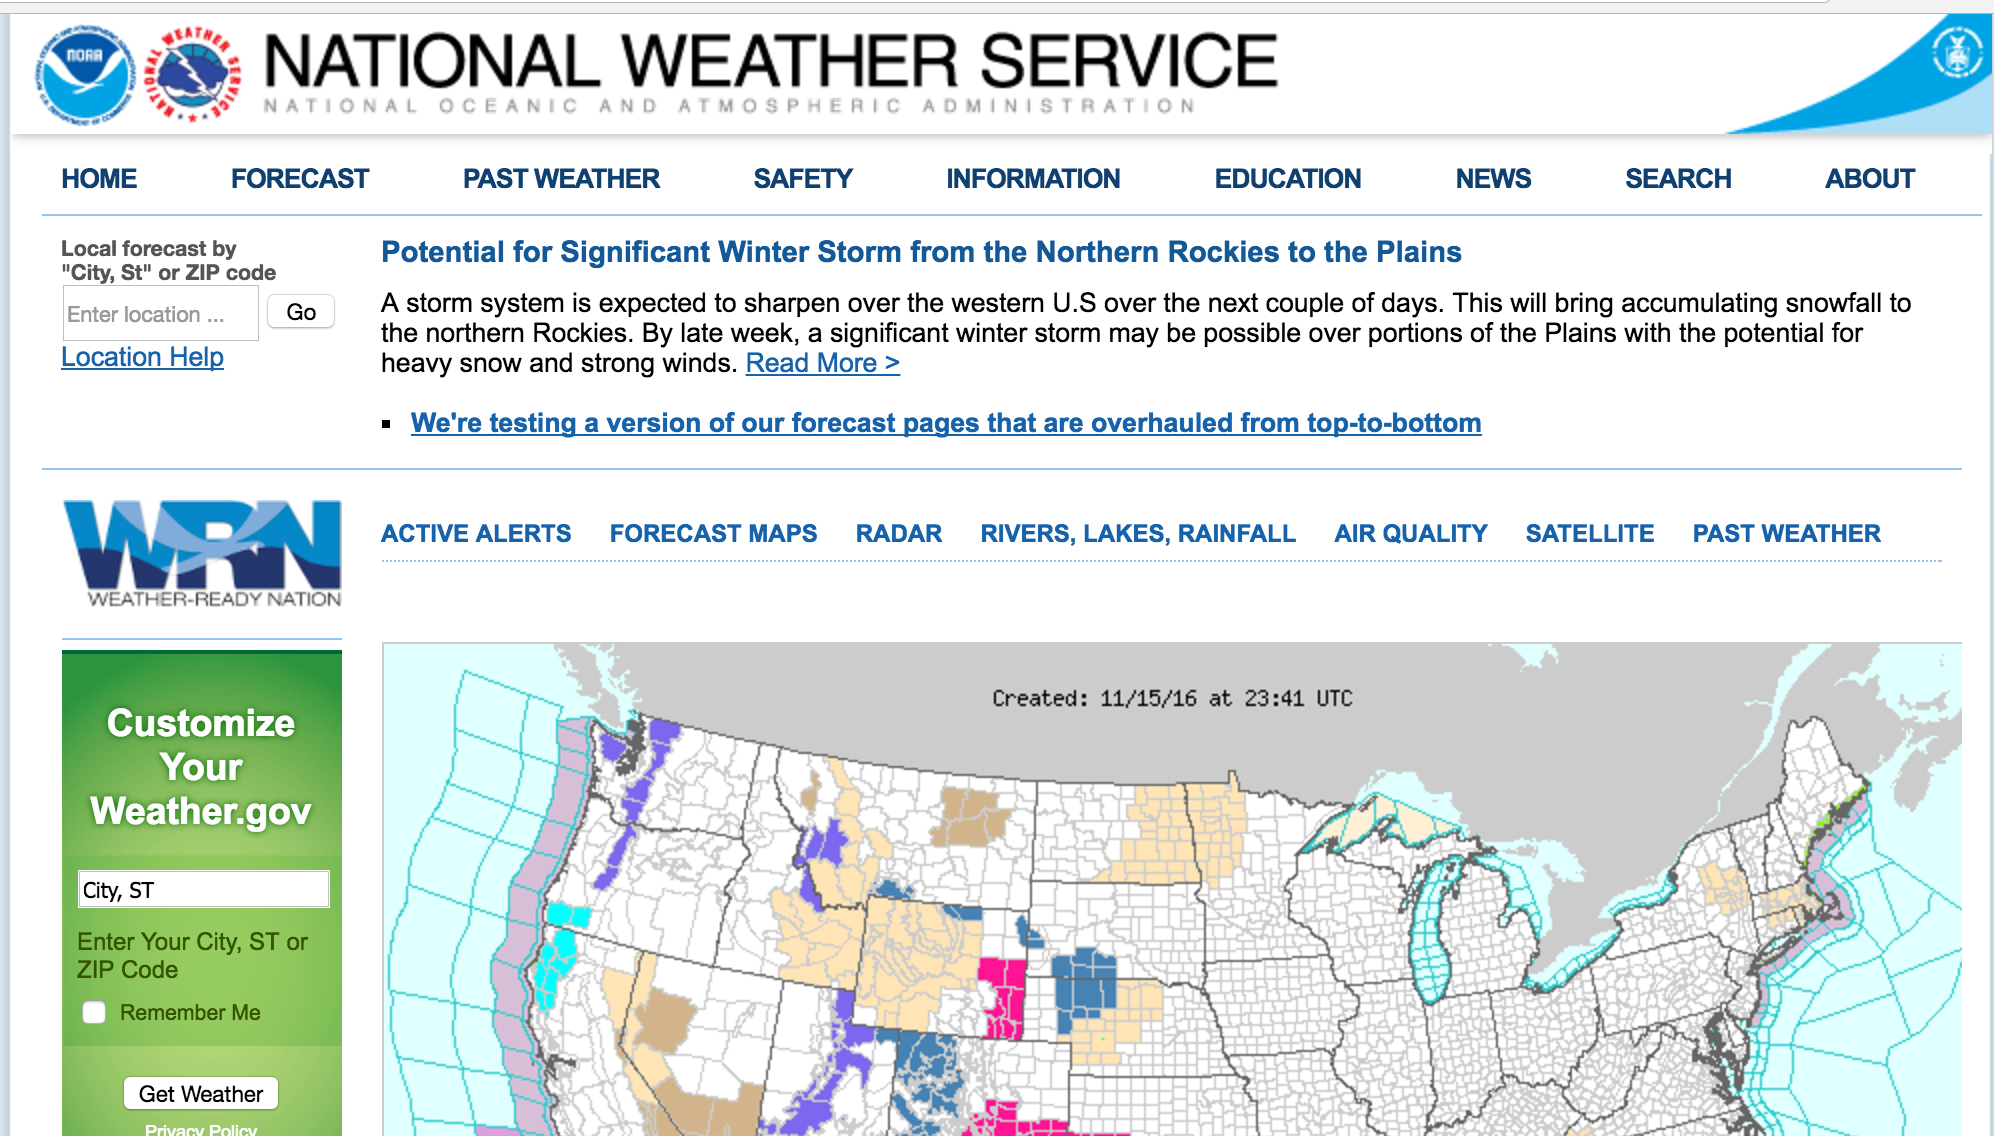
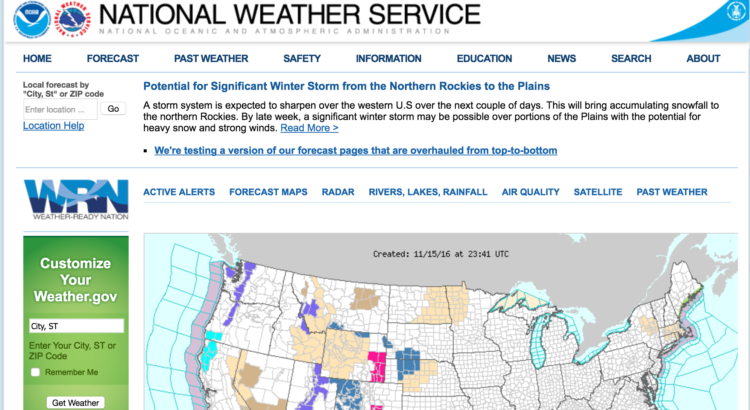
We’ll be scraping weather forecasts from the National Weather Service site.
Before we get started, if you’re looking for more background on APIs or the csv format, you might want to check out our Dataquest courses on APIs or data analysis.
The components of a web page
When we visit a web page, our web browser makes a request to a web server. This request is called a GET request, since we’re getting files from the server. The server then sends back files that tell our browser how to render the page for us. The files fall into a few main types:
- HTML – contain the main content of the page.
- CSS – add styling to make the page look nicer.
- JS – Javascript files add interactivity to web pages.
- Images – image formats, such as JPG and PNG allow web pages to show pictures.
After our browser receives all the files, it renders the page and displays it to us. There’s a lot that happens behind the scenes to render a page nicely, but we don’t need to worry about most of it when we’re web scraping. When we perform web scraping, we’re interested in the main content of the web page, so we look at the HTML.
HTML
HyperText Markup Language(HTML) is a language that web pages are created in. HTML isn’t a programming language, like Python – instead, it’s a markup language that tells a browser how to layout content. HTML allows you to do similar things to what you do in a word processor like Microsoft Word – make text bold, create paragraphs, and so on. Because HTML isn’t a programming language, it isn’t nearly as complex as Python.
Let’s take a quick tour through HTML so we know enough to scrape effectively. HTML consists of elements called tags. The most basic tag is the <html> tag. This tag tells the web browser that everything inside of it is HTML. We can make a simple HTML document just using this tag:
<html>
</html>
We haven’t added any content to our page yet, so if we viewed our HTML document in a web browser, we wouldn’t see anything:
Right inside an html tag, we put two other tags, the head tag, and the body tag. The main content of the web page goes into the body tag. The head tag contains data about the title of the page, and other information that generally isn’t useful in web scraping:
<html>
    <head>
    </head>
    <body>
    </body>
</html>
We still haven’t added any content to our page (that goes inside the body tag), so we again won’t see anything:
You may have noticed above that we put the head and body tags inside the html tag. In HTML, tags are nested, and can go inside other tags.
We’ll now add our first content to the page, in the form of the p tag. The p tag defines a paragraph, and any text inside the tag is shown as a separate paragraph:
<html>
    <head>
    </head>
    <body>
        <p>
            Here's a paragraph of text!
        </p>
        <p>
            Here's a second paragraph of text!
        </p>
    </body>
</html>
Here’s how this will look:
Here’s a paragraph of text!
Here’s a second paragraph of text!
Tags have commonly used names that depend on their position in relation to other tags:
child– a child is a tag inside another tag. So the twoptags above are both children of thebodytag.parent– a parent is the tag another tag is inside. Above, thehtmltag is the parent of thebodytag.sibiling– a sibiling is a tag that is nested inside the same parent as another tag. For example,headandbodyare siblings, since they’re both insidehtml. Bothptags are siblings, since they’re both insidebody.
We can also add properties to HTML tags that change their behavior:
<html>
    <head>
    </head>
    <body>
        <p>
            Here's a paragraph of text!
            <a href="https://www.dataquest.io">Learn Data Science Online</a>
        </p>
        <p>
            Here's a second paragraph of text!
            <a href="https://www.python.org">Python</a>
        </p>
    </body>
</html>
Here’s how this will look:
In the above example, we added two a tags. a tags are links, and tell the browser to render a link to another web page. The href property of the tag determines where the link goes.
a and p are extremely common html tags. Here are a few others:
div– indicates a division, or area, of the page.b– bolds any text inside.i– italicizes any text inside.table– creates a table.form– creates an input form.
For a full list of tags, look here.
Before we move into actual web scraping, let’s learn about the class and id properties. These special properties give HTML elements names, and make them easier to interact with when we’re scraping. One element can have multiple classes, and a class can be shared between elements. Each element can only have one id, and an id can only be used once on a page. Classes and ids are optional, and not all elements will have them.
We can add classes and ids to our example:
<html>
    <head>
    </head>
    <body>
        <p class="bold-paragraph">
            Here's a paragraph of text!
            <a href="https://www.dataquest.io" id="learn-link">Learn Data Science Online</a>
        </p>
        <p class="bold-paragraph extra-large">
            Here's a second paragraph of text!
            <a href="https://www.python.org" class="extra-large">Python</a>
        </p>
    </body>
</html>
Here’s how this will look:
As you can see, adding classes and ids doesn’t change how the tags are rendered at all.
The requests library
The first thing we’ll need to do to scrape a web page is to download the page. We can download pages using the Python requests library. The requests library will make a GET request to a web server, which will download the HTML contents of a given web page for us. There are several different types of requests we can make using requests, of which GET is just one. If you want to learn more, check out our API tutorial.
Let’s try downloading a simple sample website, http://dataquestio.github.io/web-scraping-pages/simple.html. We’ll need to first download it using the requests.get method.
import requests

page = requests.get("http://dataquestio.github.io/web-scraping-pages/simple.html")
page
After running our request, we get a Response object. This object has a status_code property, which indicates if the page was downloaded successfully:
page.status_code
A status_code of 200 means that the page downloaded successfully. We won’t fully dive into status codes here, but a status code starting with a 2 generally indicates success, and a code starting with a 4 or a 5 indicates an error.
We can print out the HTML content of the page using the content property:
page.content
Parsing a page with BeautifulSoup
As you can see above, we now have downloaded an HTML document.
We can use the BeautifulSoup library to parse this document, and extract the text from the p tag. We first have to import the library, and create an instance of the BeautifulSoup class to parse our document:
from bs4 import BeautifulSoup
soup = BeautifulSoup(page.content, 'html.parser')
We can now print out the HTML content of the page, formatted nicely, using the prettify method on the BeautifulSoup object:
print(soup.prettify())
As all the tags are nested, we can move through the structure one level at a time. We can first select all the elements at the top level of the page using the children property of soup. Note that children returns a list generator, so we need to call the list function on it:
list(soup.children)
The above tells us that there are two tags at the top level of the page – the initial <!DOCTYPE html> tag, and the <html> tag. There is a newline character (n) in the list as well. Let’s see what the type of each element in the list is:
[type(item) for item in list(soup.children)]
As you can see, all of the items are BeautifulSoup objects. The first is a Doctype object, which contains information about the type of the document. The second is a NavigableString, which represents text found in the HTML document. The final item is a Tag object, which contains other nested tags. The most important object type, and the one we’ll deal with most often, is the Tag object.
The Tag object allows us to navigate through an HTML document, and extract other tags and text. You can learn more about the various BeautifulSoup objects here.
We can now select the html tag and its children by taking the third item in the list:
html = list(soup.children)[2]
Each item in the list returned by the children property is also a BeautifulSoup object, so we can also call the children method on html.
Now, we can find the children inside the html tag:
list(html.children)
As you can see above, there are two tags here, head, and body. We want to extract the text inside the p tag, so we’ll dive into the body:
body = list(html.children)[3]
Now, we can get the p tag by finding the children of the body tag:
list(body.children)
We can now isolate the p tag:
p = list(body.children)[1]
Once we’ve isolated the tag, we can use the get_text method to extract all of the text inside the tag:
p.get_text()
Finding all instances of a tag at once
What we did above was useful for figuring out how to navigate a page, but it took a lot of commands to do something fairly simple. If we want to extract a single tag, we can instead use the find_all method, which will find all the instances of a tag on a page.
soup = BeautifulSoup(page.content, 'html.parser')
soup.find_all('p')
Note that find_all returns a list, so we’ll have to loop through, or use list indexing, it to extract text:
soup.find_all('p')[0].get_text()
If you instead only want to find the first instance of a tag, you can use the find method, which will return a single BeautifulSoup object:
soup.find('p')
We introduced classes and ids earlier, but it probably wasn’t clear why they were useful. Classes and ids are used by CSS to determine which HTML elements to apply certain styles to. We can also use them when scraping to specify specific elements we want to scrape. To illustrate this principle, we’ll work with the following page:
<html>
    <head>
        <title>A simple example page</title>
    </head>
    <body>
        <div>
            <p class="inner-text first-item" id="first">
                First paragraph.
            </p>
            <p class="inner-text">
                Second paragraph.
            </p>
        </div>
        <p class="outer-text first-item" id="second">
            <b>
                First outer paragraph.
            </b>
        </p>
        <p class="outer-text">
            <b>
                Second outer paragraph.
            </b>
        </p>
    </body>
</html>
We can access the above document at the URL http://dataquestio.github.io/web-scraping-pages/ids_and_classes.html. Let’s first download the page and create a BeautifulSoup object:
page = requests.get("http://dataquestio.github.io/web-scraping-pages/ids_and_classes.html")
soup = BeautifulSoup(page.content, 'html.parser')
soup
Now, we can use the find_all method to search for items by class or by id. In the below example, we’ll search for any p tag that has the class outer-text:
soup.find_all('p', class_='outer-text')
In the below example, we’ll look for any tag that has the class outer-text:
soup.find_all(class_="outer-text")
We can also search for elements by id:
soup.find_all(id="first")
Using CSS Selectors
You can also search for items using CSS selectors. These selectors are how the CSS language allows developers to specify HTML tags to style. Here are some examples:
p a– finds allatags inside of aptag.body p a– finds allatags inside of aptag inside of abodytag.html body– finds allbodytags inside of anhtmltag.p.outer-text– finds allptags with a class ofouter-text.p#first– finds allptags with an id offirst.body p.outer-text– finds anyptags with a class ofouter-textinside of abodytag.
You can learn more about CSS selectors here.
BeautifulSoup objects support searching a page via CSS selectors using the select method. We can use CSS selectors to find all the p tags in our page that are inside of a div like this:
soup.select("div p")
Note that the select method above returns a list of BeautifulSoup objects, just like find and find_all.
Downloading weather data
We now know enough to proceed with extracting information about the local weather from the National Weather Service website. The first step is to find the page we want to scrape. We’ll extract weather information about downtown San Francisco from this page.
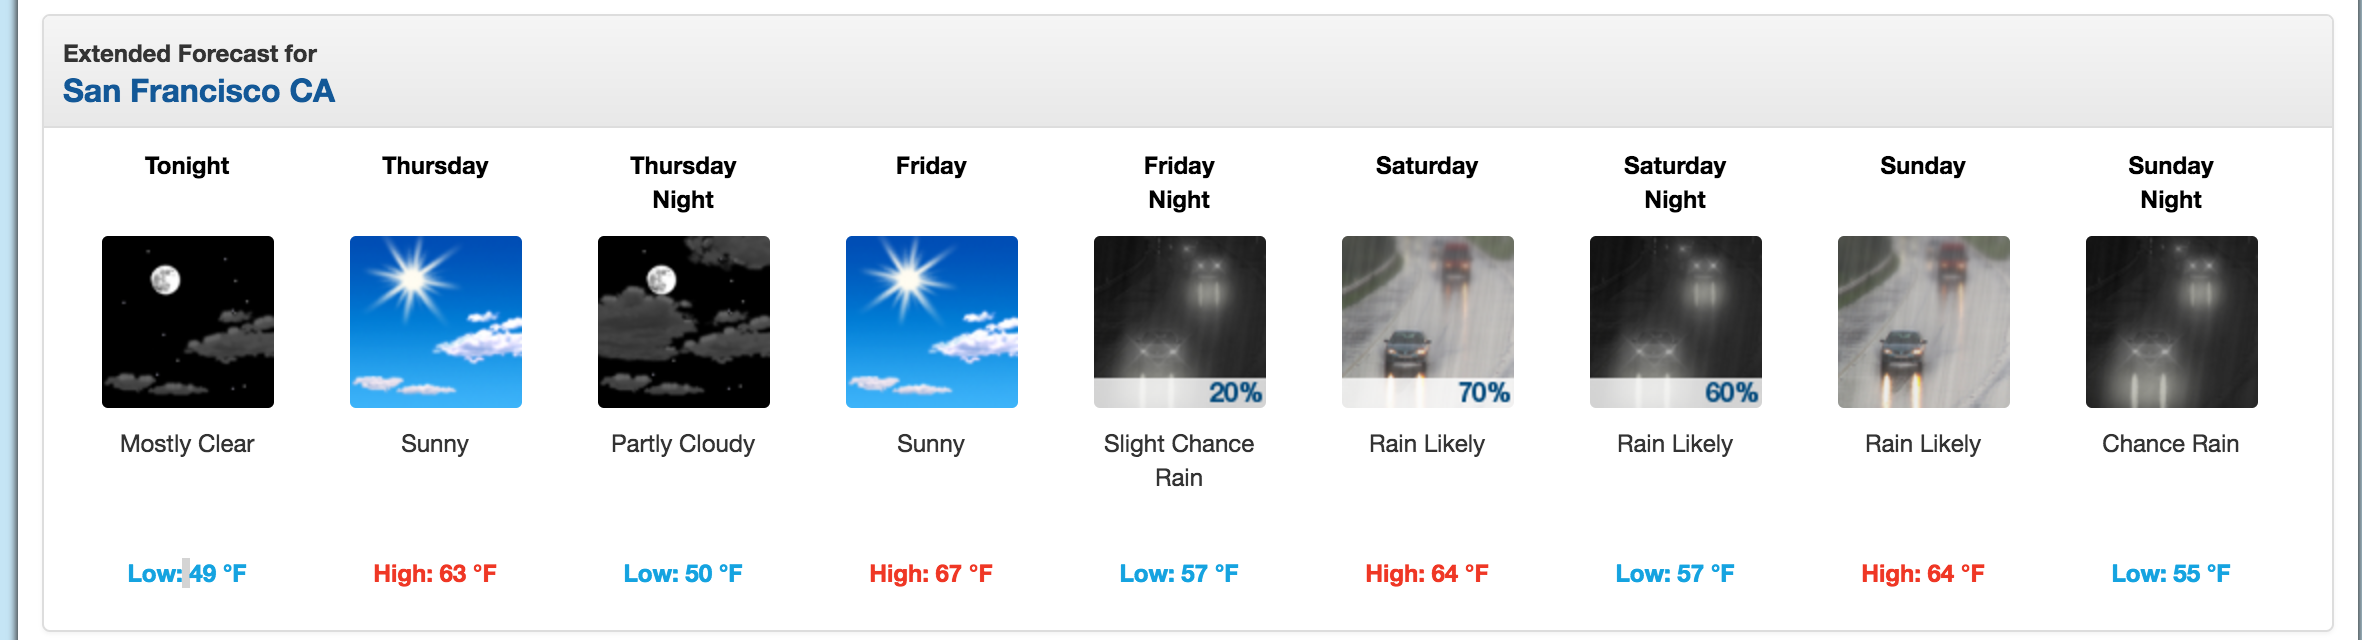
We’ll extract data about the extended forecast.
As you can see from the image, the page has information about the extended forecast for the next week, including time of day, temperature, and a brief description of the conditions.
Exploring page structure with Chrome DevTools
The first thing we’ll need to do is inspect the page using Chrome Devtools. If you’re using another browser, Firefox and Safari have equivalents. It’s recommended to use Chrome though.
You can start the developer tools in Chrome by clicking View -> Developer -> Developer Tools. You should end up with a panel at the bottom of the browser like what you see below. Make sure the Elements panel is highlighted:
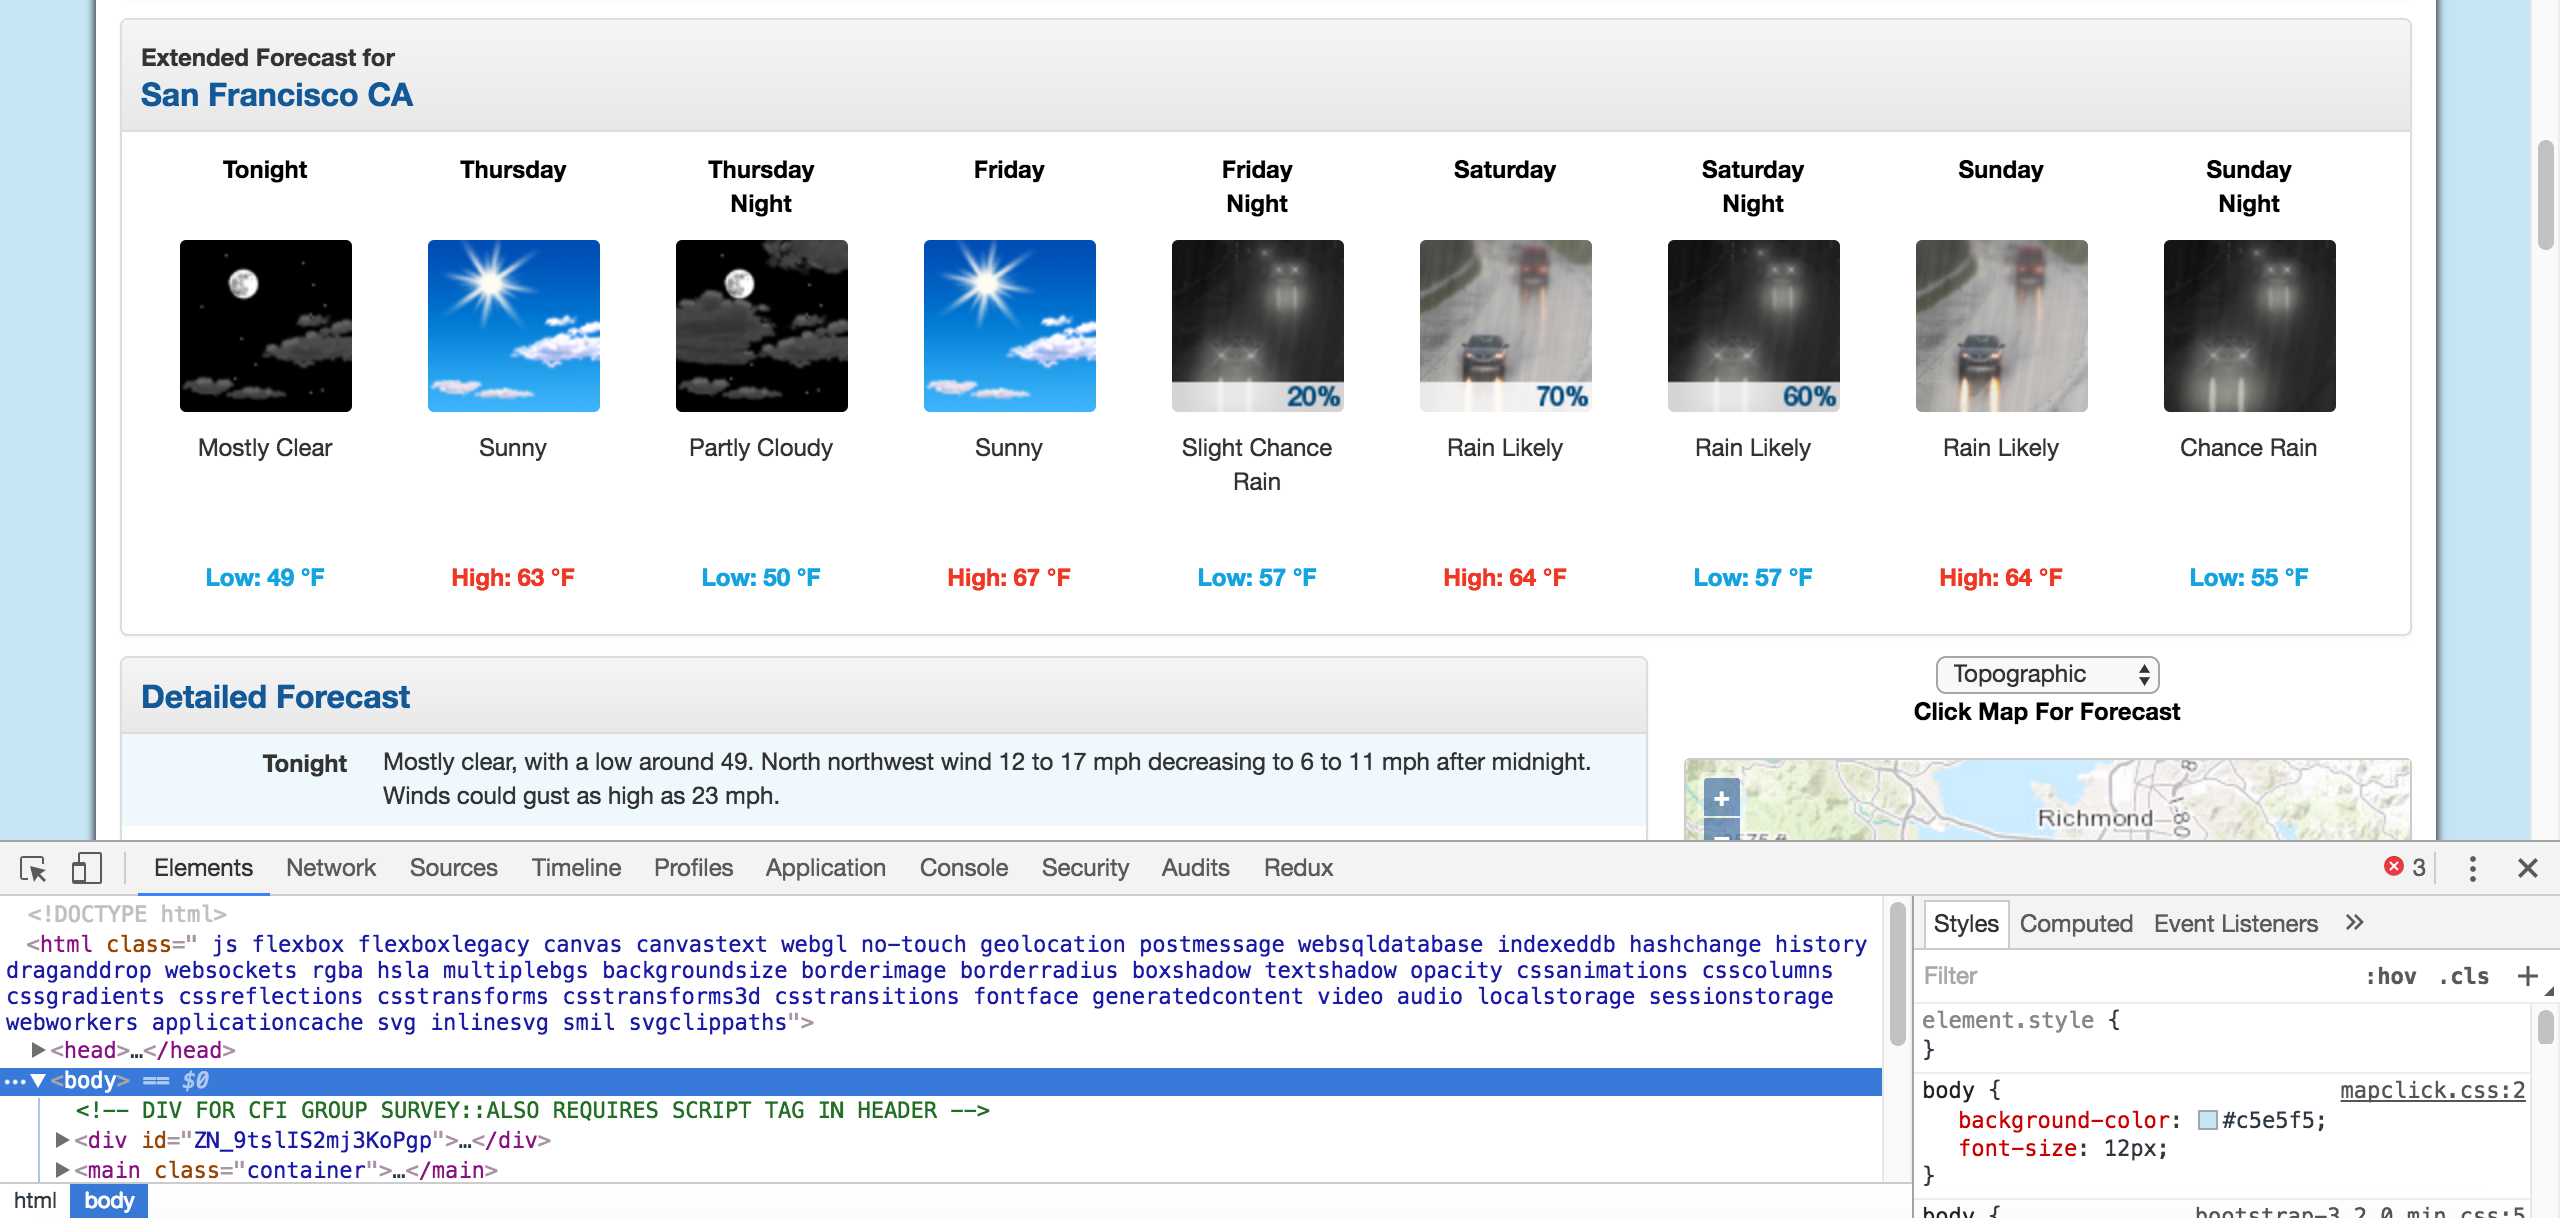
Chrome Developer Tools.
The elements panel will show you all the HTML tags on the page, and let you navigate through them. It’s a really handy feature!
By right clicking on the page near where it says “Extended Forecast”, then clicking “Inspect”, we’ll open up the tag that contains the text “Extended Forecast” in the elements panel:
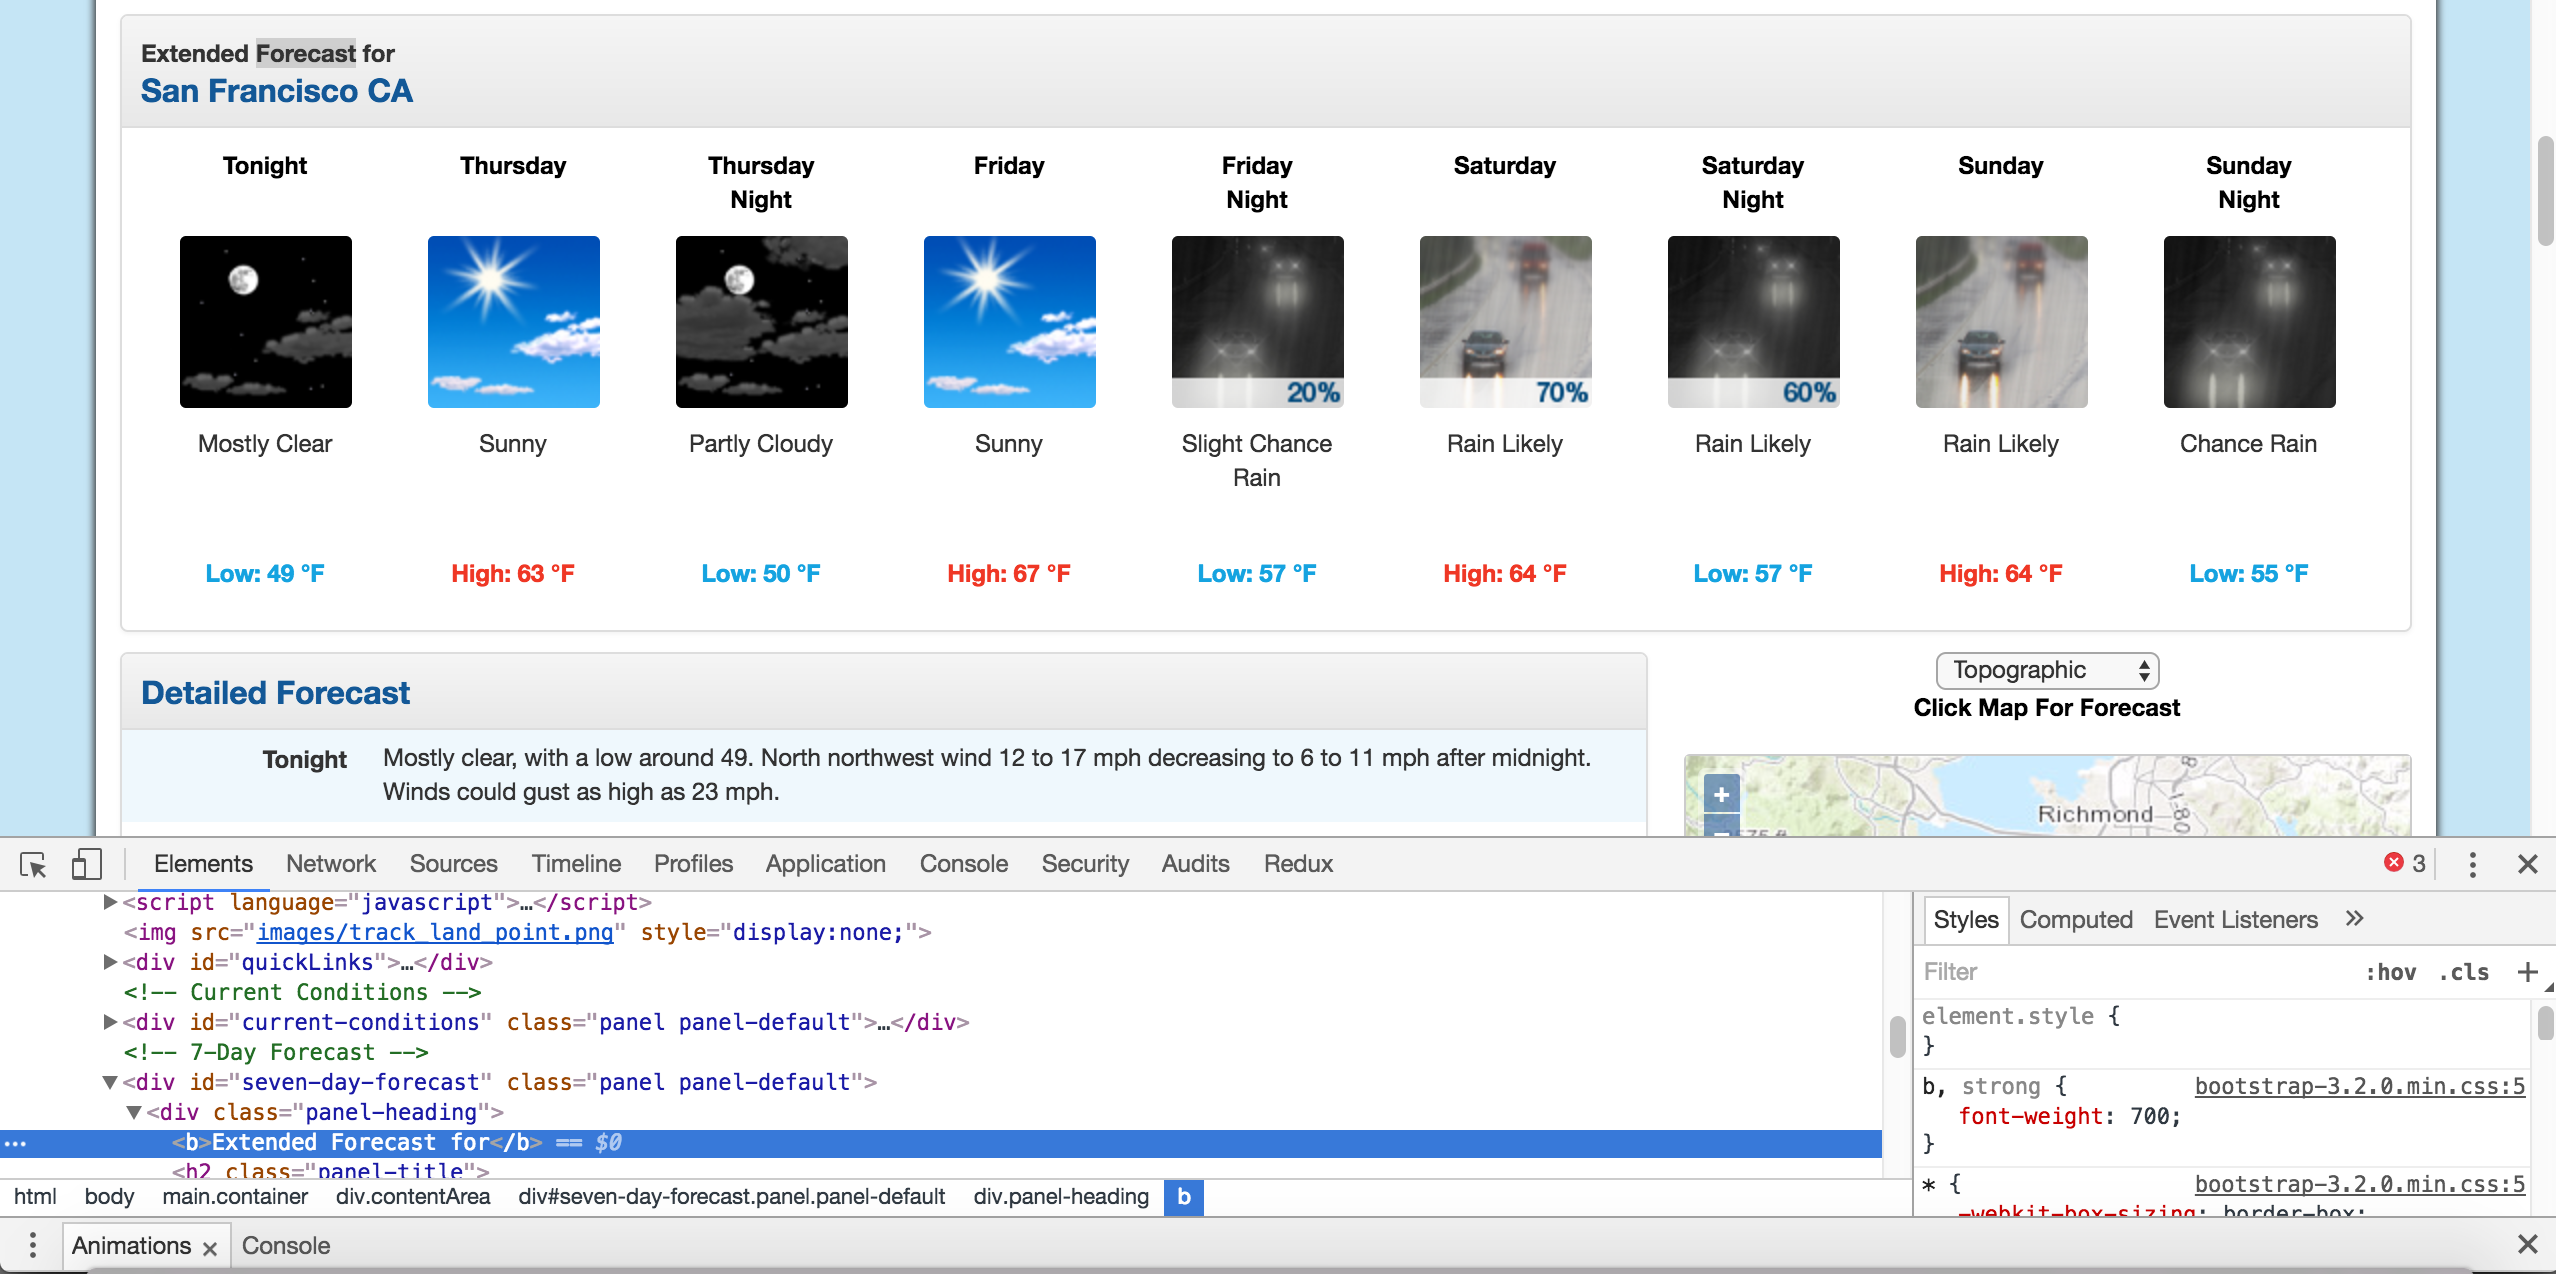
The extended forecast text.
We can then scroll up in the elements panel to find the “outermost” element that contains all of the text that corresponds to the extended forecasts. In this case, it’s a div tag with the id seven-day-forecast:
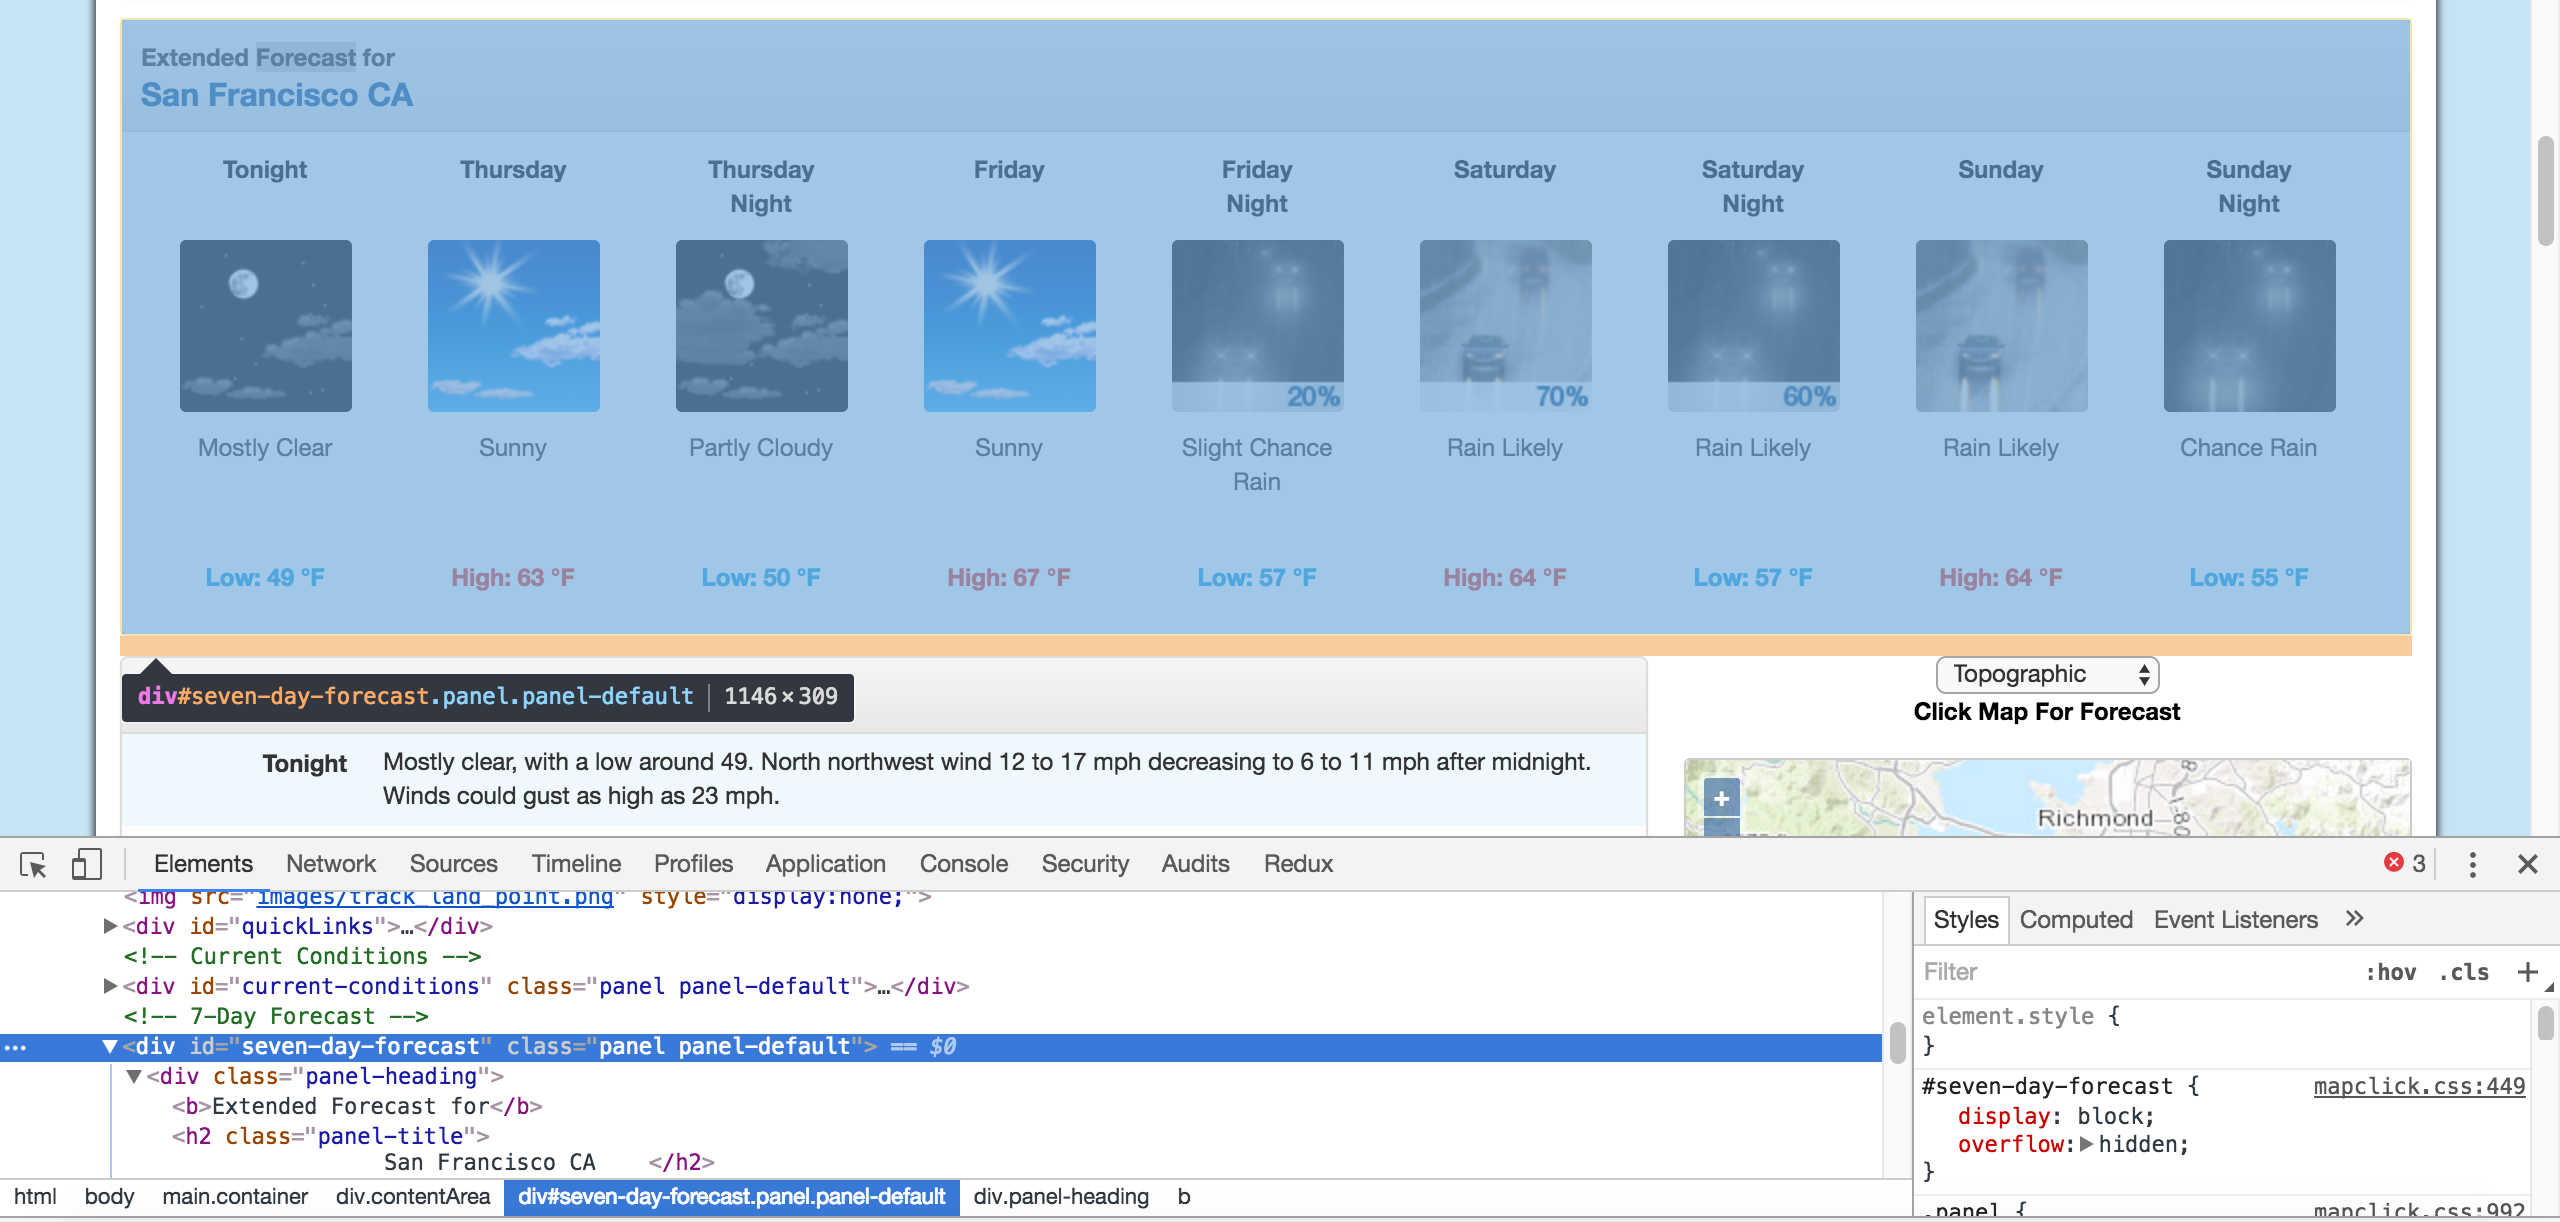
The div that contains the extended forecast items.
If you click around on the console, and explore the div, you’ll discover that each forecast item (like “Tonight”, “Thursday”, and “Thursday Night”) is contained in a div with the class tombstone-container.
We now know enough to download the page and start parsing it. In the below code, we:
- Download the web page containing the forecast.
- Create a
BeautifulSoupclass to parse the page. - Find the
divwith idseven-day-forecast, and assign toseven_day - Inside
seven_day, find each individual forecast item. - Extract and print the first forecast item.
page = requests.get("http://forecast.weather.gov/MapClick.php?lat=37.7772&lon=-122.4168")
soup = BeautifulSoup(page.content, 'html.parser')
seven_day = soup.find(id="seven-day-forecast")
forecast_items = seven_day.find_all(class_="tombstone-container")
tonight = forecast_items[0]
print(tonight.prettify())
As you can see, inside the forecast item tonight is all the information we want. There are 4 pieces of information we can extract:
- The name of the forecast item – in this case,
Tonight. - The description of the conditions – this is stored in the
titleproperty ofimg. - A short description of the conditions – in this case,
Mostly Clear. - The temperature low – in this case,
49degrees.
We’ll extract the name of the forecast item, the short description, and the temperature first, since they’re all similar:
period = tonight.find(class_="period-name").get_text()
short_desc = tonight.find(class_="short-desc").get_text()
temp = tonight.find(class_="temp").get_text()

print(period)
print(short_desc)
print(temp)
Now, we can extract the title attribute from the img tag. To do this, we just treat the BeautifulSoup object like a dictionary, and pass in the attribute we want as a key:
img = tonight.find("img")
desc = img['title']

print(desc)
Now that we know how to extract each individual piece of information, we can combine our knowledge with css selectors and list comprehensions to extract everything at once.
In the below code, we:
- Select all items with the class
period-nameinside an item with the classtombstone-containerinseven_day. - Use a list comprehension to call the
get_textmethod on eachBeautifulSoupobject.
period_tags = seven_day.select(".tombstone-container .period-name")
periods = [pt.get_text() for pt in period_tags]
periods
As you can see above, our technique gets us each of the period names, in order. We can apply the same technique to get the other 3 fields:
short_descs = [sd.get_text() for sd in seven_day.select(".tombstone-container .short-desc")]
temps = [t.get_text() for t in seven_day.select(".tombstone-container .temp")]
descs = [d["title"] for d in seven_day.select(".tombstone-container img")]

print(short_descs)
print(temps)
print(descs)
Combining our data into a Pandas Dataframe
We can now combine the data into a Pandas DataFrame and analyze it. A DataFrame is an object that can store tabular data, making data analysis easy. If you want to learn more about Pandas, check out our free to start course here.
In order to do this, we’ll call the DataFrame class, and pass in each list of items that we have. We pass them in as part of a dictionary. Each dictionary key will become a column in the DataFrame, and each list will become the values in the column:
import pandas as pd
weather = pd.DataFrame({
        "period": periods,
        "short_desc": short_descs,
        "temp": temps,
        "desc":descs
    })
weather
We can now do some analysis on the data. For example, we can use a regular expression and the Series.str.extract method to pull out the numeric temperature values:
temp_nums = weather["temp"].str.extract("(?P<temp_num>d+)", expand=False)
weather["temp_num"] = temp_nums.astype('int')
temp_nums
We could then find the mean of all the high and low temperatures:
weather["temp_num"].mean()
We could also only select the rows that happen at night:
is_night = weather["temp"].str.contains("Low")
weather["is_night"] = is_night
is_night
weather[is_night]
Next Steps
You should now have a good understanding of how to scrape web pages and extract data. A good next step would be to pick a site and try some web scraping on your own. Some good examples of data to scrape are:
- News articles
- Sports scores
- Weather forecasts
- Stock prices
- Online retailer prices
You may also want to keep scraping the National Weather Service, and see what other data you can extract from the page, or about your own city.
If you want to learn more about any of the topics covered here, check out the following resources: