Python is famous for coming with batteries included. Sophisticated capabilities are available in the standard library. You can find modules for working with sockets, parsing CSV, JSON, and XML files, and working with files and file paths.
However great the packages included with Python are, there are many fantastic projects available outside the standard library. These are most often hosted at the Python Packaging Index (PyPI), historically known as the Cheese Shop. At PyPI, you can find everything from Hello World to advanced deep learning libraries.
In this tutorial, you’ll cover how to upload your own package to PyPI. While getting your project published is easier than it used to be, there are still a few steps involved.
You’ll learn how to:
- Prepare your Python package for publication
- Think about versioning
- Upload your package to PyPI
Throughout this tutorial, we’ll use a simple example project: a reader package that can be used to read Real Python tutorials. The first section introduces this project.
Free Bonus: Click here to get access to a chapter from Python Tricks: The Book that shows you Python’s best practices with simple examples you can apply instantly to write more beautiful + Pythonic code.
A Small Python Package
This section will describe a small Python package that we’ll use as an example that can be published to PyPI. If you already have a package that you want to publish, feel free to skim this section and join up again at the beginning of the next section.
The package that we’ll use is called reader and is an application that can be used to download and read Real Python articles. If you want to follow along, you can get the full source code from our GitHub repository.
Note: The source code as shown and explained below is a simplified, but fully functional, version of the Real Python feed reader. Compared to the package published on PyPI and GitHub, this version lacks some error handling and extra options.
First, have a look at the directory structure of reader. The package lives completely inside a directory that is also named reader:
reader/
│
├── reader/
│   ├── config.txt
│   ├── feed.py
│   ├── __init__.py
│   ├── __main__.py
│   └── viewer.py
│
├── tests/
│   ├── test_feed.py
│   └── test_viewer.py
│
├── MANIFEST.in
├── README.md
└── setup.py
The source code of the package is in a reader subdirectory together with a configuration file. There are a few tests in a separate subdirectory. The tests will not be covered here, but you can find them in the GitHub repository. To learn more about testing, see Anthony Shaw’s great tutorial on Getting Started With Testing in Python.
If you’re working with your own package, you may use a different structure or have other files in your package directory. Our Python Application Layouts reference discusses several different options. The instructions in this guide will work independently of the layout you use.
In the rest of this section, you’ll see how the reader package works. In the next section, you’ll get a closer look at the special files, including setup.py, README.md, and MANIFEST.in, that are needed to publish your package.
Using the Real Python Reader
reader is a very basic web feed reader that can download the latest Real Python articles from the Real Python feed.
Here is an example of using the reader to get the list of the latest articles:
$ python -m reader
The latest tutorials from Real Python (https://realpython.com/)
  0 How to Publish an Open-Source Python Package to PyPI
  1 Top 10 Must-Watch PyCon Talks
  2 Logging in Python
  3 The Best Python Books
  4 Conditional Statements in Python
  5 Structuring Python Programs
  6 We're Celebrating 1 Million Page Views per Month!
  7 Python Pandas: Tricks & Features You May Not Know
  8 Python Community Interview With Mariatta Wijaya
  9 Primer on Python Decorators
 10 Sets in Python
 11 The Ultimate Guide to Django Redirects
 12 Advanced Git Tips for Python Developers
 13 Python Community Interview With Mike Driscoll
 14 Dictionaries in Python
 15 Socket Programming in Python (Guide)
 16 Python Code Quality: Tools & Best Practices
 17 Documenting Python Code: A Complete Guide
 18 Fast, Flexible, Easy and Intuitive: How to Speed Up Your Pandas Projects
 19 Lists and Tuples in Python
Notice that each article is numbered. To read one particular article, you use the same command but include the number of the article as well. For instance, to read How to Publish an Open-Source Python Package to PyPI, you add 0 to the command:
$ python -m reader 0
# How to Publish an Open-Source Python Package to PyPI

Python is famous for coming with batteries included. Sophisticated
capabilities are available in the standard library. You can find modules
for working with sockets, parsing CSV, JSON, and XML files, and
working with files and file paths.

However great the packages included with Python are, there are many
fantastic projects available outside the standard library. These are
most often hosted at the Python Packaging Index (PyPI), historically
known as the Cheese Shop. At PyPI, you can find everything from Hello
World to advanced deep learning libraries.

[... The full text of the article ...]
This prints the full article to the console using the Markdown text format.
Note: python -m is used to run a library module or package instead of a script. If you run a package, the contents of the file __main__.py will be executed. See Different Ways of Calling a Package for more info.
By changing the article number, you can read any of the available articles.
A Quick Look at the Code
The details of how reader works are not important for the purpose of this tutorial. However, if you are interested in seeing the implementation, you can expand the sections below. The package consists of five files:
config.txt is a configuration file used to specify the URL of the feed of Real Python tutorials. It’s a text file that can be read by the configparser standard library:
# config.txt

[feed]
url = https://realpython.com/atom.xml
In general, such a config file contains key-value pairs separated into sections. This particular file contains only one section (feed) and one key (url).
Note: A configuration file is probably overkill for this simple package. We include it here for demonstration purposes.
The first source code file we’ll look at is __main__.py. The double underscores indicate that this file has a special meaning in Python. Indeed, when running a package as a script with -m as above, Python executes the contents of the __main__.py file.
In other words, __main__.py acts as the entry point of our program and takes care of the main flow, calling other parts as needed:
# __main__.py

from configparser import ConfigParser
from importlib import resources  # Python 3.7+
import sys

from reader import feed
from reader import viewer

def main():
    """Read the Real Python article feed"""
    # Read URL of the Real Python feed from config file
    cfg = ConfigParser()
    cfg.read_string(resources.read_text("reader", "config.txt"))
    url = cfg.get("feed", "url")

    # If an article ID is given, show the article
    if len(sys.argv) > 1:
        article = feed.get_article(url, sys.argv[1])
        viewer.show(article)

    # If no ID is given, show a list of all articles
    else:
        site = feed.get_site(url)
        titles = feed.get_titles(url)
        viewer.show_list(site, titles)

if __name__ == "__main__":
    main()
Notice that main() is called on the last line. If we do not call main(), then our program would not do anything. As you saw earlier, the program can either list all articles or print one specific article. This is handled by the if-else inside main().
To read the URL to the feed from the configuration file, we use configparser and importlib.resources. The latter is used to import non-code (or resource) files from a package without having to worry about the full file path. It is especially helpful when publishing packages to PyPI where resource files might end up inside binary archives.
importlib.resources became a part of the standard library in Python 3.7. If you are using an older version of Python, you can use importlib_resources instead. This is a backport compatible with Python 2.7, and 3.4 and above. importlib_resources can be installed from PyPI:
$ pip install importlib_resources
See Barry Warzaw’s presentation at PyCon 2018 for more information.
The next file is __init__.py. Again, the double underscores in the filename tell us that this is a special file. __init__.py represents the root of your package. It should usually be kept quite simple, but it’s a good place to put package constants, documentation, and so on:
# __init__.py

# Version of the realpython-reader package
__version__ = "1.0.0"
The special variable __version__ is a convention in Python for adding version numbers to your package. It was introduced in PEP 396. We’ll talk more about versioning later.
Variables defined in __init__.py become available as variables in the package namespace:
>>> import reader
>>> reader.__version__
'1.0.0'
You should define the __version__ variable in your own packages as well.
Looking at __main__.py, you’ll see that two modules, feed and viewer, are imported and used to read from the feed and show the results. These modules do most of the actual work.
First consider feed.py. This file contains functions for reading from a web feed and parsing the result. Luckily there are already great libraries available to do this. feed.py depends on two modules that are already available on PyPI: feedparser and html2text.
feed.py contains several functions. We’ll discuss them one at a time.
To avoid reading from the web feed more than necessary, we first create a function that remembers the feed the first time it’s read:
 1 # feed.py
 2
 3 import feedparser
 4 import html2text
 5
 6 _CACHED_FEEDS = dict()
 7
 8 def _feed(url):
 9     """Only read a feed once, by caching its contents"""
10     if url not in _CACHED_FEEDS:
11         _CACHED_FEEDS[url] = feedparser.parse(url)
12     return _CACHED_FEEDS[url]
feedparser.parse() reads a feed from the web and returns it in a structure that looks like a dictionary. To avoid downloading the feed more than once, it’s stored in _CACHED_FEEDS and reused for later calls to _feed(). Both _CACHED_FEEDS and _feed() are prefixed by an underscore to indicate that they are support objects not meant to be used directly.
We can get some basic information about the feed by looking in the .feed metadata. The following function picks out the title and link to the web site containing the feed:
14 def get_site(url):
15     """Get name and link to web site of the feed"""
16     info = _feed(url).feed
17     return f"{info.title} ({info.link})"
In addition to .title and .link, attributes like .subtitle, .updated, and .id are also available.
The articles available in the feed can be found inside the .entries list. Article titles can be found with a list comprehension:
19 def get_titles(url):
20     """List titles in feed"""
21     articles = _feed(url).entries
22     return [a.title for a in articles]
.entries lists the articles in the feed sorted chronologically, so that the newest article is .entries[0].
In order to get the contents of one article, we use its index in the .entries list as an article ID:
24 def get_article(url, article_id):
25     """Get article from feed with the given ID"""
26     articles = _feed(url).entries
27     article = articles[int(article_id)]
28     html = article.content[0].value
29     text = html2text.html2text(html)
30     return f"# {article.title}nn{text}"
After picking the correct article out of the .entries list, we find the text of the article as HTML on line 28. Next, html2text does a decent job of translating the HTML into much more readable text. As the HTML doesn’t contain the title of the article, the title is added before returning.
The final module is viewer.py. At the moment, it consists of two very simple functions. In practice, we could have used print() directly in __main__.py instead of calling viewer functions. However, having the functionality split off makes it easier to replace it later with something more advanced. Maybe we could add a GUI interface in a later version?
viewer.py contains two functions:
# viewer.py

def show(article):
    """Show one article"""
    print(article)

def show_list(site, titles):
    """Show list of articles"""
    print(f"The latest tutorials from {site}")
    for article_id, title in enumerate(titles):
        print(f"{article_id:>3} {title}")
show() simply prints one article to the console, while show_list() prints a list of titles. The latter also creates article IDs that are used when choosing to read one particular article.
Different Ways of Calling a Package
One challenge when your projects grow in complexity is communicating to the user how to use your project. Since the package consists of four different source code files, how does the user know which file to call to run reader?
The python interpreter program has an -m option that allows you to specify a module name instead of a file name. For instance, if you have a script called hello.py, the following two commands are equivalent:
$ python hello.py
Hi there!

$ python -m hello
Hi there!
One advantage of the latter is that it allows you to call modules that are built into Python as well. One example is calling antigravity:
$ python -m antigravity
Created new window in existing browser session.
Another advantage of using -m is that it works for packages as well as modules. As you saw earlier, you can call the reader package with -m:
$ python -m reader
[...]
Since reader is a package, the name only refers to a directory. How does Python decide which code inside that directory to run? It looks for a file named __main__.py. If such a file exists, it is executed. If __main__.py does not exist, then an error message is printed:
$ python -m math
python: No code object available for math
In this example, you see that the math standard library has not defined a __main__.py file.
If you are creating a package that is supposed to be executed, you should include a __main__.py file. Later, you’ll see how you can also create entry points to your package that will behave like regular programs.
Preparing Your Package for Publication
Now you’ve got a package you want to publish, or maybe you copied our package. Which steps are necessary before you can upload the package to PyPI?
Naming Your Package
The first—and possibly the hardest—step is to come up with a good name for your package. All packages on PyPI need to have unique names. With more than 150,000 packages already on PyPI, chances are that your favorite name is already taken.
You might need to brainstorm and do some research to find the perfect name. Use the PyPI search to check if a name is already taken. The name that you come up with will be visible on PyPI.
To make the reader package easier to find on PyPI, we give it a more descriptive name and call it realpython-reader. The same name will be used to install the package using pip:
$ pip install realpython-reader
Even though we use realpython-reader as the PyPI name, the package is still called reader when it’s imported:
>>> import reader
>>> help(reader)

>>> from reader import feed
>>> feed.get_titles()
['How to Publish an Open-Source Python Package to PyPI', ...]
As you see, you can use different names for your package on PyPI and when importing. However, if you use the same name or very similar names, then it will be easier for your users.
Configuring Your Package
In order for your package to be uploaded to PyPI, you need to provide some basic information about it. This information is typically provided in the form of a setup.py file. There are initiatives that try to simplify this collection of information. At the moment though, setup.py is the only fully supported way of providing information about your package.
The setup.py file should be placed in the top folder of your package. A fairly minimal setup.py for reader looks like this:
import pathlib
from setuptools import setup

# The directory containing this file
HERE = pathlib.Path(__file__).parent

# The text of the README file
README = (HERE / "README.md").read_text()

# This call to setup() does all the work
setup(
    name="realpython-reader",
    version="1.0.0",
    description="Read the latest Real Python tutorials",
    long_description=README,
    long_description_content_type="text/markdown",
    url="https://github.com/realpython/reader",
    author="Real Python",
    author_email="office@realpython.com",
    license="MIT",
    classifiers=[
        "License :: OSI Approved :: MIT License",
        "Programming Language :: Python :: 3",
        "Programming Language :: Python :: 3.7",
    ],
    packages=["reader"],
    include_package_data=True,
    install_requires=["feedparser", "html2text"],
    entry_points={
        "console_scripts": [
            "realpython=reader.__main__:main",
        ]
    },
)
We will only cover some of the options available in setuptools here. The documentation does a good job of going into all the detail.
The parameters that are 100% necessary in the call to setup() are the following:
name: the name of your package as it will appear on PyPIversion: the current version of your packagepackages: the packages and subpackages containing your source code
We will talk more about versions later. The packages parameter takes a list of packages. In our example, there is only one package: reader.
You also need to specify any subpackages. In more complicated projects, there might be many packages to list. To simplify this job, setuptools includes find_packages(), which does a good job of discovering all your subpackages. You could have used find_packages() in the reader project as follows:
from setuptools import find_packages, setup

setup(
    ...
    packages=find_packages(exclude=("tests",)),
    ...
)
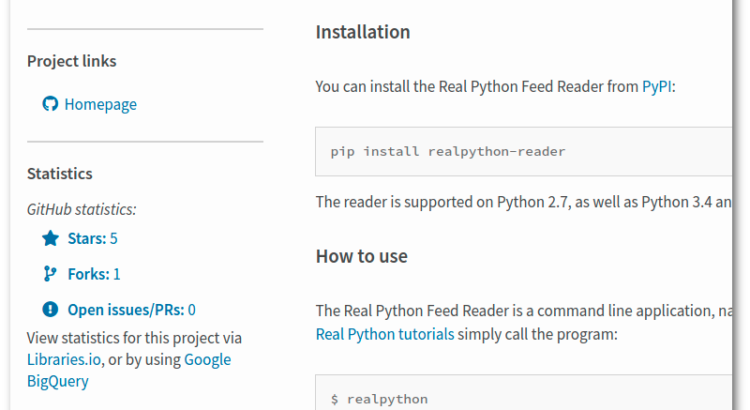
While only name, version, and packages are required, your package becomes much easier to find on PyPI if you add some more information. Have a look at the realpython-reader page on PyPI and compare the information with setup.py above. All the information comes from setup.py and README.md.

The last two parameters to setup() deserve special mention:
-
install_requiresis used to list any dependencies your package has to third party libraries. Thereaderdepends onfeedparserandhtml2text, so they should be listed here. -
entry_pointsis used to create scripts that call a function within your package. In our example, we create a new scriptrealpythonthat callsmain()within thereader/__main__.pyfile.
For another example of a typical setup file, see Kenneth Reitz’s setup.py repository on GitHub.
Documenting Your Package
Before releasing your package to the world, you should add some documentation. Depending on your package, the documentation can be as small as a simple README file, or as big as a full web page with tutorials, example galleries, and an API reference.
At a minimum, you should include a README file with your project. A good README should quickly describe your project, as well as tell your users how to install and use your package. Typically, you want to include your README as the long_description argument to setup(). This will display your README on PyPI.
Traditionally, PyPI has used reStructuredText for package documentation. However, since March 2018 Markdown has also been supported.
Outside of PyPI, Markdown is more widely supported than reStructuredText. If you don’t need any of the special features of reStructuredText, you’ll be better off keeping your README in Markdown. Note that you should use the setup() parameter long_description_content_type to tell PyPI which format you are using. Valid values are text/markdown, text/x-rst, and text/plain.
For bigger projects, you might want to offer more documentation than can reasonably fit in a single file. In that case, you can use sites like GitHub or Read the Docs, and link to the documentation using the url parameter. In the setup.py example above, url is used to link to the reader GitHub repository.
Versioning Your Package
Your package needs to have a version, and PyPI will only let you do one upload of a particular version for a package. In other words, if you want to update your package on PyPI, you need to increase the version number first. This is a good thing, as it guarantees reproducibility: two systems with the same version of a package should behave the same.
There are many different schemes that can be used for your version number. For Python projects, PEP 440 gives some recommendations. However, in order to be flexible, that PEP is complicated. For a simple project, stick with a simple versioning scheme.
Semantic versioning is a good default scheme to use. The version number is given as three numerical components, for instance 0.1.2. The components are called MAJOR, MINOR, and PATCH, and there are simple rules about when to increment each component:
- Increment the MAJOR version when you make incompatible API changes.
- Increment the MINOR version when you add functionality in a backwards-compatible manner.
- Increment the PATCH version when you make backwards-compatible bug fixes. (Source)
You may need to specify the version in different files inside your project. In the reader project, we specified the version both in setup.py and in reader/__init__.py. To make sure the version numbers are kept consistent, you can use a tool called Bumpversion.
You can install Bumpversion from PyPI:
$ pip install bumpversion
To increment the MINOR version of reader, you would do something like this:
$ bumpversion --current-version 1.0.0 minor setup.py reader/__init__.py
This would change the version number from 1.0.0 to 1.1.0 in both setup.py and reader/__init__.py. To simplify the command, you can also give most of the information in a configuration file. See the Bumpversion documentation for details.
Adding Files to Your Package
Sometimes, you’ll have files inside your package that are not source code files. Examples include data files, binaries, documentation, and—as we have in this project—configuration files.
To tell setup() to include such files, you use a manifest file. For many projects, you don’t need to worry about the manifest, as setup() creates one that includes all code files as well as README files.
If you need to change the manifest, you create a manifest template which must be named MANIFEST.in. This file specifies rules for what to include and exclude:
include reader/*.txt
This example will include all .txt files in the reader directory, which in effect is the configuration file. See the documentation for a list of available rules.
In addition to creating MANIFEST.in, you also need to tell setup() to copy these non-code files. This is done by setting the include_package_data argument to True:
setup(
    ...
    include_package_data=True,
    ...
)
The include_package_data argument controls whether non-code files are copied when your package is installed.
Publishing to PyPI
Your package is finally ready to meet the world outside your computer! In this section, you’ll see how to actually upload your package to PyPI.
If you don’t already have an account on PyPI, now is the time to create one: register your account on PyPI. While you’re at it, you should also register an account on TestPyPI. TestPyPI is very useful, as you can try all the steps of publishing a package without any consequences if you mess up.
To upload your package to PyPI, you’ll use a tool called Twine. You can install Twine using Pip as usual:
$ pip install twine
Using Twine is quite simple, and you will soon see how to use it to check and publish your package.
Building Your Package
Packages on PyPI are not distributed as plain source code. Instead, they are wrapped into distribution packages. The most common formats for distribution packages are source archives and Python wheels.
A source archive consists of your source code and any supporting files wrapped into one tar file. Similarly, a wheel is essentially a zip archive containing your code. In contrast to the source archive, the wheel includes any extensions ready to use.
To create a source archive and a wheel for your package, you can run the following command:
$ python setup.py sdist bdist_wheel
This will create two files in a newly created dist directory, a source archive and a wheel:
reader/
│
└── dist/
    ├── realpython_reader-1.0.0-py3-none-any.whl
    └── realpython-reader-1.0.0.tar.gz
Note: On Windows, the source archive will be a .zip file by default. You can choose the format of the source archive with the --format command line option.
You might wonder how setup.py knows what to do with the sdist and bdist_wheel arguments. If you look back to how setup.py was implemented, there is no mention of sdist, bdist_wheel, or any other command line arguments.
All the command line arguments are instead implemented in the upstream distutils standard library. You can list all available arguments by adding the --help-commands option:
$ python setup.py --help-commands
Standard commands:
  build             build everything needed to install
  build_py          "build" pure Python modules (copy to build directory)
  build_ext         build C/C++ and Cython extensions (compile/link to build directory)
< ... many more commands ...>
For information about one particular command, you can do something like python setup.py sdist --help.
Testing Your Package
First, you should check that the newly built distribution packages contain the files you expect. On Linux and macOS, you should be able to list the contents of the tar source archive as follows:
$ tar tzf realpython-reader-1.0.0.tar.gz
realpython-reader-1.0.0/
realpython-reader-1.0.0/setup.cfg
realpython-reader-1.0.0/README.md
realpython-reader-1.0.0/reader/
realpython-reader-1.0.0/reader/feed.py
realpython-reader-1.0.0/reader/__init__.py
realpython-reader-1.0.0/reader/viewer.py
realpython-reader-1.0.0/reader/__main__.py
realpython-reader-1.0.0/reader/config.txt
realpython-reader-1.0.0/PKG-INFO
realpython-reader-1.0.0/setup.py
realpython-reader-1.0.0/MANIFEST.in
realpython-reader-1.0.0/realpython_reader.egg-info/
realpython-reader-1.0.0/realpython_reader.egg-info/SOURCES.txt
realpython-reader-1.0.0/realpython_reader.egg-info/requires.txt
realpython-reader-1.0.0/realpython_reader.egg-info/dependency_links.txt
realpython-reader-1.0.0/realpython_reader.egg-info/PKG-INFO
realpython-reader-1.0.0/realpython_reader.egg-info/entry_points.txt
realpython-reader-1.0.0/realpython_reader.egg-info/top_level.txt
On Windows, you can use a utility like 7-zip to look inside the corresponding zip file.
You should see all your source code listed, as well as a few new files that have been created containing information you provided in setup.py. In particular, make sure that all subpackages and supporting files are included.
You can also have a look inside the wheel by unzipping it as if it were a zip file. However, if your source archive contains the files you expect, the wheel should be fine as well.
Newer versions of Twine (1.12.0 and above) can also check that your package description will render properly on PyPI. You can run twine check on the files created in dist:
$ twine check dist/*
Checking distribution dist/realpython_reader-1.0.0-py3-none-any.whl: Passed
Checking distribution dist/realpython-reader-1.0.0.tar.gz: Passed
While it won’t catch all problems you might run into, it will for instance let you know if you are using the wrong content type.
Uploading Your Package
Now you’re ready to actually upload your package to PyPI. For this, you’ll again use the Twine tool, telling it to upload the distribution packages you have built. First, you should upload to TestPyPI to make sure everything works as expected:
$ twine upload --repository-url https://test.pypi.org/legacy/ dist/*
Twine will ask you for your username and password.
Note: If you’ve followed the tutorial using the reader package as an example, the previous command will probably fail with a message saying you are not allowed to upload to the realpython-reader project.
You can change the name in setup.py to something unique, for example test-your-username. Then build the project again and upload the newly built files to TestPyPI.
If the upload succeeds, you can quickly head over to TestPyPI, scroll down, and look at your project being proudly displayed among the new releases! Click on your package and make sure everything looks okay.
If you have been following along using the reader package, the tutorial ends here! While you can play with TestPyPI as much as you want, you shouldn’t upload dummy packages to PyPI just for testing.
However, if you have your own package to publish, then the moment has finally arrived! With all the preparations taken care of, this final step is short:
$ twine upload dist/*
Provide your username and password when requested. That’s it!
Head over to PyPI and look up your package. You can find it either by searching, by looking at the Your projects page, or by going directly to the URL of your project: pypi.org/project/your-package-name/.
Congratulations! Your package is published on PyPI!
pip install Your Package
Take a moment to bask in the blue glow of the PyPI web page and (of course) brag to your friends.
Then open up a terminal again. There is one more great pay off!
With your package uploaded to PyPI, you can install it with pip as well:
$ pip install your-package-name
Replace your-package-name with the name you chose for your package. For instance, to install the reader package, you would do the following:
$ pip install realpython-reader
Seeing your own code installed by pip is a wonderful feeling!
Other Useful Tools
Before wrapping up, there are a few other tools that are useful to know about when creating and publishing Python packages.
Virtual Environments
In this guide, we haven’t talked about virtual environments. Virtual environments are very useful when working with different projects, each with their own differing requirements and dependencies.
See the following guides for more information:
- Python Virtual Environments: A Primer
- Pipenv: A Guide to the New Python Packaging Tool
- Managing Python Dependencies With Pip and Virtual Environments
In particular, it’s useful to test your package inside a minimal virtual environment to make sure you’re including all necessary dependencies in your setup.py file.
Cookiecutter
One great way to get started with your project is to use Cookiecutter. It sets up your project by asking you a few questions based on a template. Many different templates are available.
First, make sure you have Cookiecutter installed on your system. You can install it from PyPI:
$ pip install cookiecutter
As an example, we’ll use the pypackage-minimal template. To use a template, give Cookiecutter a link to the template:
$ cookiecutter https://github.com/kragniz/cookiecutter-pypackage-minimal
author_name [Louis Taylor]: Real Python
author_email [louis@kragniz.eu]: office@realpython.com
package_name [cookiecutter_pypackage_minimal]: realpython-reader
package_version [0.1.0]:
package_description [...]: Read Real Python tutorials
package_url [...]: https://github.com/realpython/reader
readme_pypi_badge [True]:
readme_travis_badge [True]: False
readme_travis_url [...]:
After you have answered a series of questions, Cookiecutter sets up your project. In this example, the template created the following files and directories:
realpython-reader/
│
├── realpython-reader/
│   └── __init__.py
│
├── tests/
│   ├── __init__.py
│   └── test_sample.py
│
├── README.rst
├── setup.py
└── tox.ini
Cookiecutter’s documentation is extensive and includes a long list of available cookiecutters, as well as tutorials on how to create your own template.
Flit
The history of packaging in Python is quite messy. One common criticism is that using an executable file like setup.py for configuration information is not ideal.
PEP 518 defines an alternative: using a file called pyproject.toml instead. The TOML format is a simple configuration file format:
[…] it is human-usable (unlike JSON), it is flexible enough (unlike configparser), stems from a standard (also unlike configparser), and it is not overly complex (unlike YAML). (Source)
While PEP 518 is already a few years old, the pyproject.toml configuration file is not yet fully supported in the standard tools.
However, there are a few new tools that can publish to PyPI based on pyproject.toml. One such tool is Flit, a great little project that makes it easy to publish simple Python packages. Flit doesn’t support advanced packages like those creating C extensions.
You can pip install flit, and then start using it as follows:
$ flit init
Module name [reader]:
Author []: Real Python
Author email []: office@realpython.com
Home page []: https://github.com/realpython/reader
Choose a license (see http://choosealicense.com/ for more info)
1. MIT - simple and permissive
2. Apache - explicitly grants patent rights
3. GPL - ensures that code based on this is shared with the same terms
4. Skip - choose a license later
Enter 1-4 [1]:

Written pyproject.toml; edit that file to add optional extra info.
The flit init command will create a pyproject.toml file based on the answers you give to a few questions. You might need to edit this file slightly before using it. For the reader project, the pyproject.toml file for Flit ends up looking as follows:
[build-system]
requires = ["flit"]
build-backend = "flit.buildapi"

[tool.flit.metadata]
module = "reader"
dist-name = "realpython-reader"
description-file = "README.md"
author = "Real Python"
author-email = "office@realpython.com"
home-page = "https://github.com/realpython/reader"
classifiers = [
    "License :: OSI Approved :: MIT License",
    "Programming Language :: Python :: 3",
    "Programming Language :: Python :: 3.7",
]
requires-python = ">=3.7"
requires = ["feedparser", "html2text"]

[tool.flit.scripts]
realpython = "reader.__main__:main"
You should recognize most of the items from our original setup.py. One thing to note though is that version and description are missing. This is not a mistake. Flit actually figures these out itself by using __version__ and the docstring defined in the __init__.py file. Flit’s documentation explains everything about the pyproject.toml file.
Flit can build your package and even publish it to PyPI. To build your package, simply do the following:
$ flit build
This creates a source archive and a wheel, exactly like python setup.py sdist bdist_wheel did earlier. To upload your package to PyPI, you can use Twine as earlier. However, you can also use Flit directly:
$ flit publish
The publish command will build your package if necessary, and then upload the files to PyPI, prompting you for your username and password if necessary.
To see Flit in action, have a look at the 2 minute lightning talk from EuroSciPy 2017. The Flit documentation is a great resource for more information. Brett Cannon’s tutorial on packaging up your Python code for PyPI includes a section about Flit.
Poetry
Poetry is another tool that can be used to build and upload your package. It’s quite similar to Flit, especially for the things we’re looking at here.
Before you use Poetry, you need to install it. It’s possible to pip install poetry as well. However, the author recommends that you use a custom installation script to avoid potential dependency conflicts. See the documentation for installation instructions.
With Poetry installed, you start using it with an init command:
$ poetry init

This command will guide you through creating your pyproject.toml config.

Package name [code]: realpython-reader
Version [0.1.0]: 1.0.0
Description []: Read the latest Real Python tutorials
...
This will create a pyproject.toml file based on your answers to questions about your package. Unfortunately, the actual specifications inside the pyproject.toml differ between Flit and Poetry. For Poetry, the pyproject.toml file ends up looking like the following:
[tool.poetry]
name = "realpython-reader"
version = "1.0.0"
description = "Read the latest Real Python tutorials"
readme = "README.md"
homepage = "https://github.com/realpython/reader"
authors = ["Real Python <office@realpython.com>"]
license = "MIT"
packages = [{include = "reader"}]
include = ["reader/*.txt"]

[tool.poetry.dependencies]
python = ">=3.7"
feedparser = ">=5.2"
html2text = ">=2018.1"

[tool.poetry.scripts]
realpython = "reader.__main__:main"

[build-system]
requires = ["poetry>=0.12"]
build-backend = "poetry.masonry.api"
Again, you should recognize all these items from the earlier discussion of setup.py. One thing to note is that Poetry will automatically add classifiers based on the license and the version of Python you specify. Poetry also requires you to be explicit about versions of your dependencies. In fact, dependency management is one of the strong points of Poetry.
Just like Flit, Poetry can build and upload packages to PyPI. The build command creates a source archive and a wheel:
$ poetry build
This will create the two usual files in the dist subdirectory, which you can upload using Twine as earlier. You can also use Poetry to publish to PyPI:
$ poetry publish
This will upload your package to PyPI. In addition to building and publishing, Poetry can help you earlier in the process. Similar to Cookiecutter, Poetry can help you start a new project with the new command. It also supports working with virtual environments. See Poetry’s documentation for all the details.
Apart from the slightly different configuration files, Flit and Poetry work very similarly. Poetry is broader in scope as it also aims to help with dependency management, while Flit has been around a little longer. Andrew Pinkham’s article Python’s New Package Landscape covers both Flit and Poetry. Poetry was one of the topics at the special 100th episode of the Python Bytes podcast.
Conclusion
You now know how to prepare your project and upload it to PyPI, so that it can be installed and used by other people. While there are a few steps you need to go through, seeing your own package on PyPI is a great pay off. Having others find your project useful is even better!
In this tutorial, you’ve seen the steps necessary to publish your own package:
- Find a good name for your package
- Configure your package using
setup.py - Build your package
- Upload your package to PyPI
In addition, you’ve also seen a few new tools for publishing packages that use the new pyproject.toml configuration file to simplify the process.
If you still have questions, feel free to reach out in the comments section below. Also, the Python Packaging Authority has a lot of information with more detail than we covered here.
[ Improve Your Python With 🐍 Python Tricks 💌 – Get a short & sweet Python Trick delivered to your inbox every couple of days. >> Click here to learn more and see examples ]
Thanks for giving good information
Thanks for giving good and Helpful information